


What's up, everyone! Today we're diving into Endfield version 1.3 with a guide for the base invasion mission in Wuling's Jingyu Valley. We're taking on the Early Warning Terminal Level 4 — just set up your towers and you can basically AFK. Super simple, zero stress. Perfect for all my fellow lazy friends who just want to copy a working setup and call it a day.
Tower setup
|
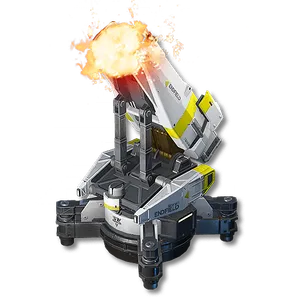
7 Sledgehammer Mortars |
4 Marsh Gas Mark I (make sure it's NOT the Mark II) |
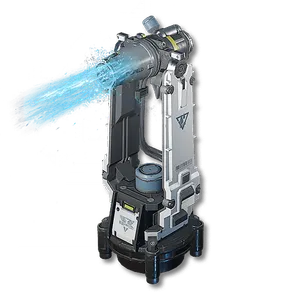
2 Deluge Towers |

Get those materials ready, and then we can dive right in.
Jingyu Valley Defense Lv.4
Getting Started
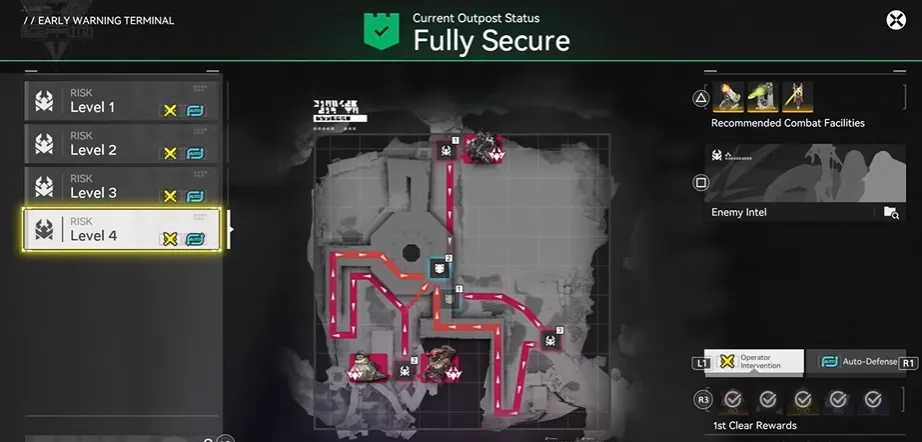
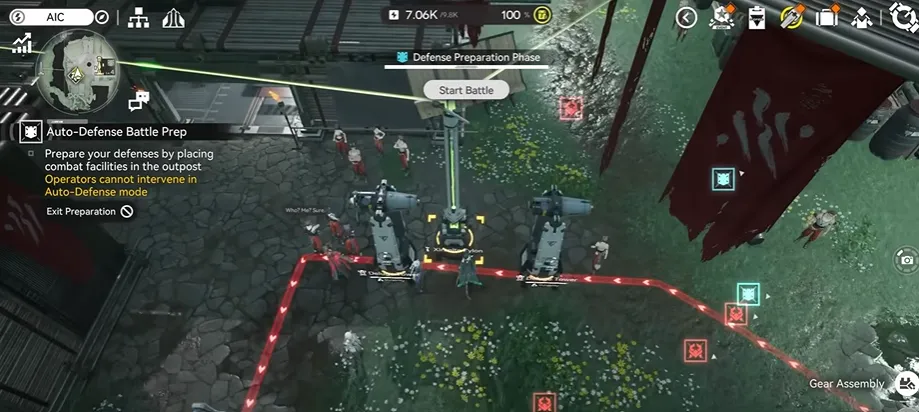
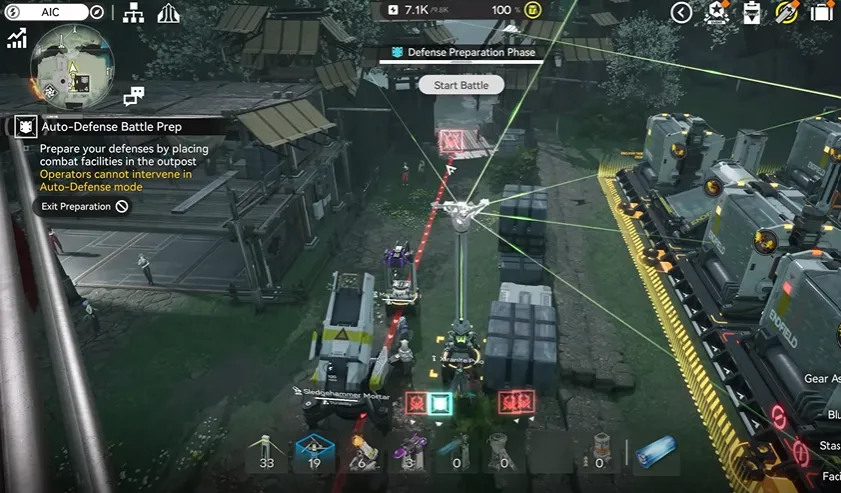
First things first, activate the Early Warning Terminal so you can see the enemy routes and the defense points. LDShop is going to play this in a full AFK style, which works perfectly for Auto Defense mode. Same goes for Operator Intervention mode — but I won't be using any operators. If you want, you can use those two extra tower slots during Auto Deployment (you know, the two bonus towers in Auto Defense mode) to make things even easier.
And one more thing — in the Unit Tech phase, you can only place 13 towers max. But once you hit Auto Defense phase, you get two more slots. So keep that in mind.
Left Side Area
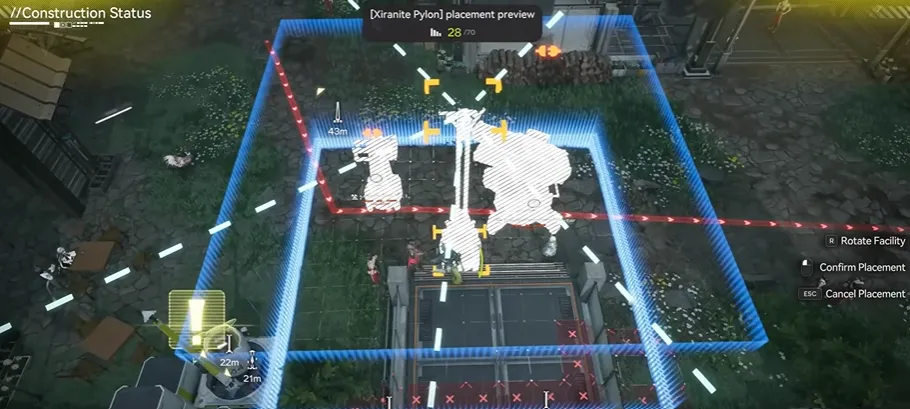
Now let us begin with the left side. In this area, deploy two Deluge Towers directly onto the red line. Place one slightly in front of the NPC, as no further placement is possible beyond that point, and then place another one in front of it — specifically on the very first deployable tile. Supply power to them using a pylon. That completes the left side. The rolling enemies, specifically the frog-like ones, will be permanently crowd-controlled by the two Deluge Towers, and the mortars positioned behind them will eliminate the targets.


 TOP UP ON LDSHOP NOW
North Entrance
Now for the north side. Some enemies will come through this entrance, so we'll use a Marsh Gas Mark I tower to keep them from reaching the entry point behind the hero. Then just drop a Sledgehammer Mortar behind it. These two towers can solo this entire lane by themselves.
Right Side Area
The same operation applies to the right side. On the east side, follow the same steps: place another Marsh Gas tower at this location, put a mortar behind it, and supply power using a pylon.
Bottom Area
Next, proceed to the bottom side. At this blue marker, deploy five Sledgehammer Mortars directly. Try placing one near this area so that its range can help deal with the frog enemy that will be permanently controlled later, keeping it pushed back. Supply power to them using a pylon. Alternatively, you may insert batteries directly — the effect is the same.
Top Area
After finishing the bottom, head up to the top. Climb up to this elevated area. If your energy is insufficient, you may either insert batteries directly or temporarily place a Thermal Storage Bank and put 50 batteries into it — that will be enough to last through the entire operation.
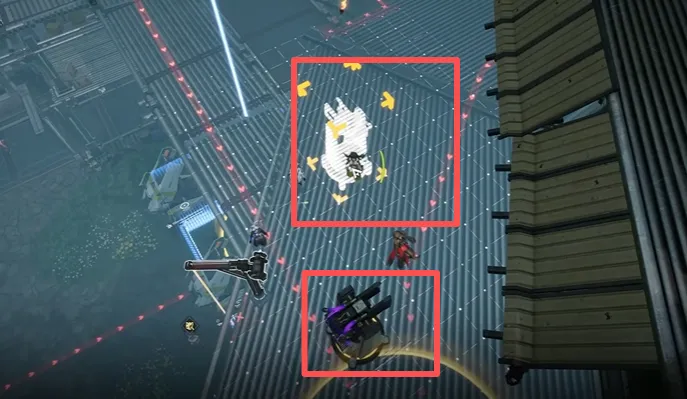
Up here, deploy the last two towers to slow down enemy movement. Place one between the two red lines, and place another symmetrically in front, as shown. These two towers are primarily for crowd control — they slow down enemies while the mortars eliminate them.
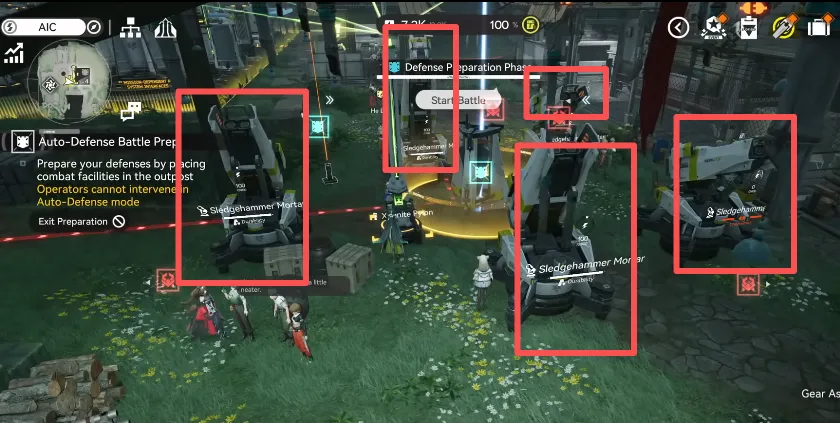
Auto Defense Mode Add-ons
In Auto Defense mode, you still have two extra tower slots left, so you can drop two more towers. LDShop highly recommend adding two more mortars right next to your base — denser firepower means a much higher success rate.
Tips
- RNG warning: This mission has a degree of randomness. With only 13 towers, results may vary — you may achieve a perfect clear, miss one or two enemies, or fail entirely.
- Unpredictable targeting: The turrets' targeting logic changes between attempts and may occasionally ignore critical targets.
- Retry if needed: If you fail on your first attempt, simply restart. Enemy movement and turret targeting differ each round — multiple attempts will eventually lead to success.
- Avoid tier 5 Marsh Gas tower: Do not use the gold (tier 5) Marsh Gas tower. Use the purple one instead.The gold tower reduces enemy defense but provides no slow effect.
Conclusion
And that's the recommended strategy after plenty of testing — super easy to copy, just set it up and go AFK. With 13 towers, the Unit Tech phase fits perfectly if you place them symmetrically. And once you're in Auto Defense mode, just drop two extra mortars next to your base and you're golden. Hope this helps you crush the Area Defense Level 4 in Jingyu Valley. Good luck and have fun!

 TOP UP WITH DISCOUNT NOW
Savannah Reed Experienced Game Editor
Savannah Reed is a senior game editor at LDShop.gg, specializing in in-depth coverage of RPG and strategy games. With a strong focus on titles like Wuthering Waves, Honkai: Star Rail and Whiteout Survival, she combines industry insight with firsthand player experience to deliver clear, informative, and actionable content. Her work is dedicated to helping gamers make smarter decisions—whether it’s understanding new updates or optimizing their in-game strategy.
