


Nori is one of the most unique additions to Brawl Stars in 2026.
This guide breaks down everything you need to know: the best Gadgets, Star Powers, Gears, game modes, and advanced gameplay tips to dominate with Nori.
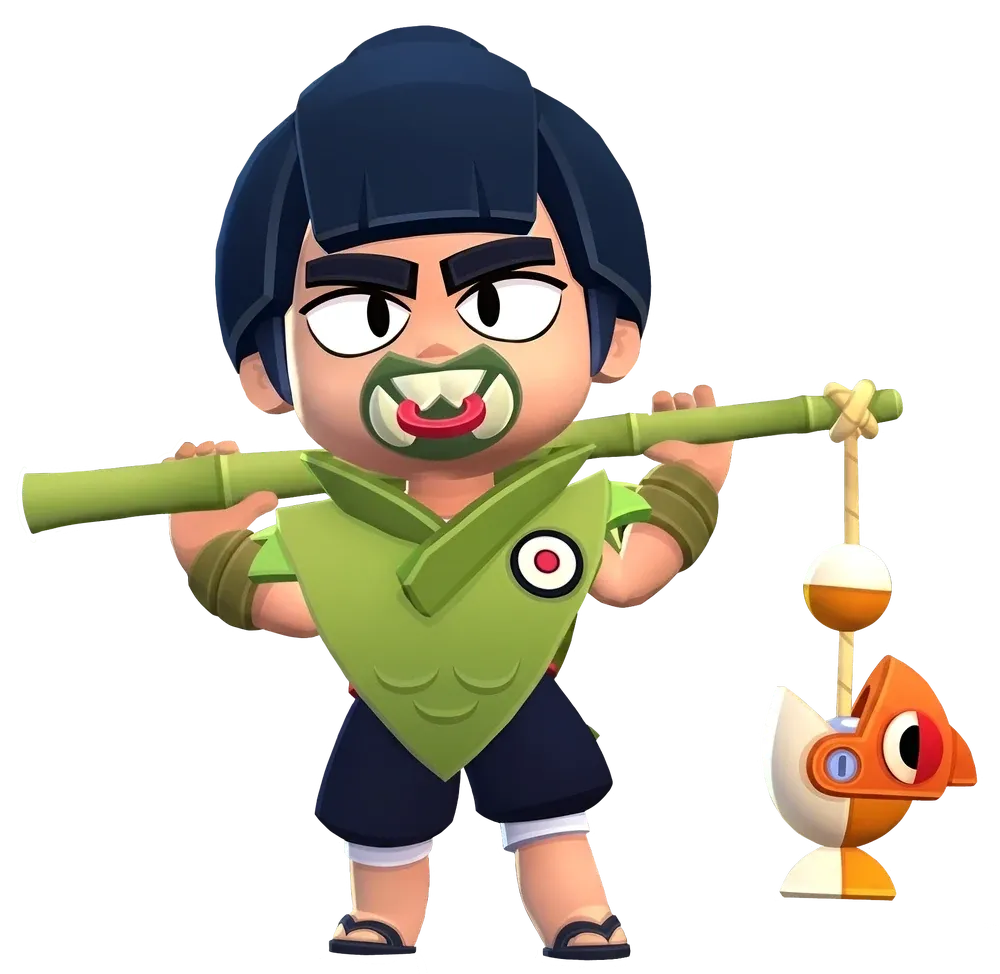
Nori Overview: Understanding the Katana Kid
Before we dive into builds, let’s get the fundamentals straight.
|
Category |
Details |
|
Rarity |
Legendary |
|
Class |
Assassin |
|
Title |
Katana Kid |
|
Prestige Title |
Gone Fishin' |
|
Movement Speed |
820 (Very Fast) |
|
Health (Level 11) |
7,400 |
|
Attack Range |
8.33 (melee) / 13.33 (ranged) / 16.67 (hook) |
|
Reload Speed |
0.1 seconds (Very Fast) |
Nori has moderately high health for an Assassin and exceptional mobility thanks to his very fast movement speed and versatile attack. His attack works similarly to Hank and Angelo — you charge up a single ammo bar for different effects.
How Nori’s Attack Works
Nori has two attack modes:
- Quick slash— If you auto-aim or quickly tap the attack button, Nori swings his fishing rod in a wide arc, dealing moderate damage instantly with no travel time.
- Charged hook— Hold the attack button to charge. The longer you charge, the farther Nori casts his hook. The hook can:
- Pull Nori to walls
- Pull Nori to enemy Brawlers (dealing damage on impact and during the dash)
- At max charge, jump over walls entirely
When Nori hits enemies with his attacks, he catches fish. He can hold up to 10 fish at a time. These fish don’t affect his main attack — they’re purely fuel for his Super.
How Nori’s Super Works
Nori’s Super, Catch of the Day, is where the fish come into play. He dives into a targeted location, disappears from the map, and creates a water puddle. After a 1-second delay, a giant fish spawns, dealing damage to all enemies in the puddle.
Here’s the kicker: Nori consumes all his fish when he uses his Super. Each fish increases:
- Puddle size by 5%
- Damage by 4%
So a Super with 10 fish is dramatically larger and more devastating than one with zero fish. The trade-off? You lose all your stored fish, even if the Super hits nobody.

Best Gadget for Nori
Nori has two Gadgets, and choosing the right one can make or break your game.
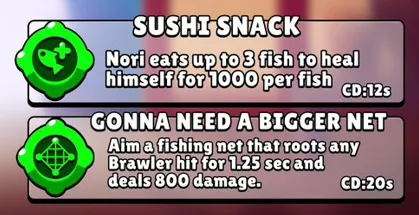
Gonna Need a Bigger Net (Best Overall)
Cooldown: 20 seconds | Damage (Level 11): 600
This Gadget fires a fishing net that roots the first enemy hit for 1.25 seconds and deals damage.
This is Nori’s strongest Gadget for most competitive matches. Why? Because Nori’s biggest weakness is slippery targets — Brawlers who can dash, jump, or simply run away. The net locks them down just long enough for Nori to close the gap and confirm the kill.
Best used for:
- Catching low-HP enemies trying to escape
- Setting up your Super for maximum damage
- Stopping ball carriers in Brawl Ball
- Interrupting enemy pushes in Gem Grab and Knockout
The root effect is especially valuable in 3v3 modes where one trapped enemy can immediately swing the team fight in your favor.
Sushi Snack (Situational)
Cooldown: 12 seconds | Heal per fish (Level 11): 875
Nori eats up to 3 fish to heal himself — 875 health per fish consumed.
This Gadget shines when survival matters more than control. It helps Nori stay alive after diving into enemy territory or trading damage in extended fights.
Best used for:
- Solo Showdown and Duo Showdown
- Knockout (where every life matters)
- Maps with limited healing options
The catch (pun intended): Consuming fish weakens your next Super. Never use Sushi Snack randomly — only pop it when staying alive is more valuable than saving fish for damage.
Verdict: Gonna Need a Bigger Net is the default choice for 3v3 modes. Sushi Snack is a strong alternative for Showdown and survival-heavy matchups.
Best Star Power for Nori
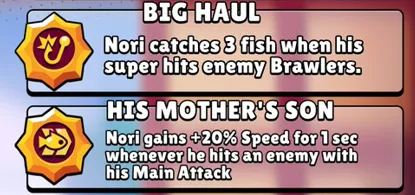
His Mother’s Son (Best Overall)
Effect: Nori gains +20% movement speed for 1 second whenever he hits an enemy with his Main Attack.
This Star Power is reliable, consistent, and always useful. Every successful hit gives Nori a speed boost that helps him:
- Chain attacks together
- Chase down fleeing enemies
- Reposition after an engage
- Escape dangerous situations
The speed boost doesn’t stack if you hit multiple enemies at once, but the uptime is excellent — as long as you’re landing attacks, you’re zooming around the map.
For most players, His Mother’s Son should be the default Star Power. It directly enhances Nori’s greatest strength:mobility.
Big Haul (Snowball Potential)
Effect: Nori catches 3 fish when his Super hits enemy Brawlers.
This Star Power is all about snowballing. If you land a good Super on multiple enemies, you instantly get 3, 6, or even 9 fish back — setting you up for another devastating Super much faster.
Best used for:
- Hot Zone (enemies often group on the zone)
- Gem Grab (enemies cluster around the gem spawn)
- Brawl Ball (crowded team fights near the goal)
The downside? Big Haul is inconsistent. If you miss your Super or only hit one enemy, you get minimal value. It also doesn’t affect the Super you just used — the fish are collected after damage is dealt, so they don’t boost the current Super’s size or damage.
Verdict:His Mother’s Son offers more consistent value across all modes. Big Haul is a fun, high-risk alternative for modes where enemies frequently group up.
Best Gears for Nori
Gears are your map-and-mode adaptation tools. Here’s how to gear up Nori for success.
Recommended Gear Setup
|
Gear |
Why It Works |
|
Damage |
Boosts damage when Nori is below 50% health — perfect for finishing kills after diving |
|
Shield |
Provides extra survivability during risky engages |
This is the safest and most balanced setup for Nori. Damage Gear increases his kill pressure, while Shield Gear gives him a buffer to survive after using his mobility aggressively.
Alternative Gear Options
Speed Gear— Use on bush-heavy maps like Snake Prairie or Cavern Churn. Nori already has great mobility; extra speed makes his engages even harder to react to.
Gadget Charge Gear— Pick this if you rely heavily on Gonna Need a Bigger Net. Extra Gadget uses can decide close matches, especially in Knockout and Brawl Ball.
Vision Gear— Situational for maps with lots of bushes where you need to track enemy positions.
Health Gear— Less important than Shield or Damage, but viable if you play Nori more patiently and need faster recovery between fights.
A Special Gift Just for You!
LDShop has a special deal for you—copy the exclusive code " LDSHOP5FF " and get a 5%OFF coupon for your next purchase! You can redeem the coupon by pasting the code in your Personal Center page, or redeem it directly at checkout. Please click the button below to top up now!


Discount code validity period: 2026.09.01 00:00:00 - 2026.10.31 23:59:59
Best Gear Combinations by Mode
|
Mode |
Recommended Gears |
|
Brawl Ball |
Damage + Gadget Charge |
|
Gem Grab |
Damage + Shield |
|
Knockout |
Shield + Damage |
|
Showdown |
Shield + Damage |
|
Hot Zone |
Damage + Shield |
Best Game Modes for Nori
Brawl Ball (S-Tier)
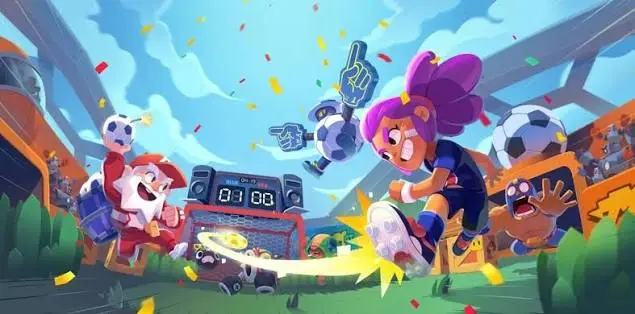
Brawl Ball is arguably Nori’s best mode. His mobility lets him:
- Jump over walls to intercept passes
- Pressure defenders with hook engages
- Punish isolated enemies near the goal
- Use Gonna Need a Bigger Net to stop ball carriers
Recommended Build: Gonna Need a Bigger Net + His Mother’s Son + Damage + Gadget Charge
Gem Grab (A-Tier)
Nori excels as an aggressive lane pressure Brawler in Gem Grab. He shouldn’t be the primary gem carrier — instead, use him to:
- Pressure enemy lanes
- Force enemies retreat
- Punish squishy mid-range Brawlers
Recommended Build:Gonna Need a Bigger Net + His Mother’s Son + Damage + Shield
Knockout (A-Tier)
One good Nori engage can win an entire round in Knockout. However, he must be played carefully— don’t dive first unless you know the enemy has no knockback or burst ready.
Recommended Build:Sushi Snack or Gonna Need a Bigger Net + His Mother’s Son + Shield + Damage
Showdown (B-Tier)
Nori is strong in Showdown thanks to his mobility and escape tools. He can:
- Chase weak enemies
- Jump over walls to escape bad fights
- Use Sushi Snack to survive tough trades
Avoid fighting tanks earlyunless you have enough fish and room to escape.
Recommended Build:Sushi Snack + His Mother’s Son + Shield + Damage
Hot Zone (B-Tier)
Hot Zone works well for Norionly on maps with walls and cover. He’s great at diving into grouped enemies and using his Super to pressure the zone. Big Haul can be excellent here if enemies often stack together.
Recommended Build: Gonna Need a Bigger Net + Big Haul + Damage + Shield
Nori Gameplay Tips: Mastering the Katana Kid
1. Don’t Waste Your Charged Attack
Nori’s attack has different uses depending on how long you hold it. Learn when to slash quickly and when to fully charge:
- Quick slash = instant damage in close range
- Partial charge = hook pull (great for chasing)
- Full charge = wall jump (essential for escapes and flanks)
2. Build Fish Before Forcing Big Fights
A Super with 0-3 fish is weak. A Super with 8-10 fish is devastating. Try to land safe hits before committing to a major engage. Your fish count directly determines your Super’s kill potential.
3. Use Walls as Tools, Not Obstacles
Nori becomes much stronger on maps where he can jump over walls or attack from unexpected angles. Practice your wall jumps — they’re the difference between a predictable Assassin and an unpredictable menace.
4. Track Enemy Cooldowns
Nori is vulnerable to knockback, stun, and burst damage. Don’t dive into a team that still has their CC abilities ready. Wait for them to use their tools, then strike.
5. Manage Your Fish Economy
Every fish you spend on Sushi Snack is a fish you don’t have for your Super. Think carefully before using the healing Gadget — sometimes it’s better to save the fish for a game-winning Super.
6. Watch Out for Hard Counters
Brawlers with knockback (like Gale or Gene), stuns (like Frank or Buzz), or anti-Assassin tools can punish Nori if he dives carelessly. Play well around their cooldowns or avoid them entirely.
Final Thoughts
Nori is a powerful but skill-based Legendary Assassin. He’s not a Brawler you can pick up and instantly dominate with — he requires practice, good aim, and smart decision-making.
If you enjoy fast, aggressive Brawlers with high outplay potential, Nori is absolutely worth learning. He’s one of the most rewarding Assassins in Brawl Stars — and with the right build and gameplay, you’ll be hooking enemies and cooking them like today’s special in no time.






 TOP UP WITH DISCOUNT NOW
Savannah Reed Experienced Game Editor
I'm a game guide writer with over 20 years of experience playing all types of games, especially anime-style RPGs, gacha and sports games. I love finding smart ways to beat tough levels without spending too much money. By studying game mechanics and character systems, I create easy tips to help players save time and resources. When I'm not gaming, I watch anime to get inspiration for strategies. My goal? To help you enjoy games more and stress less – even when facing "impossible" bosses! Let’s make gaming fun and affordable together!
