


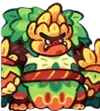
Bonobean joins Clash of Critters in Version 0.50 as a Grass Tank that fights with splitting bananas and slippery Banana Peels. Its biggest defensive upgrade comes at T3, when Grangutan gains self-healing. This guide covers all four evolutions, practical positioning, teammates and the extra skills available in Horde Invasion.
Bonobean Overview
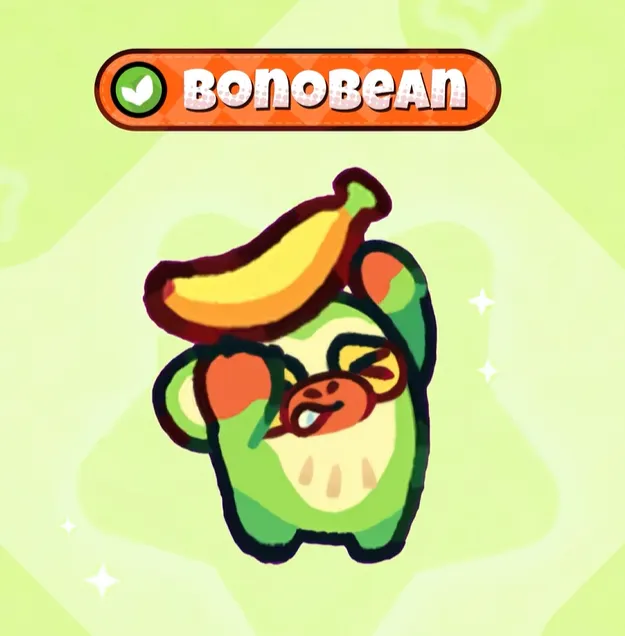
| Attribute | Details |
|---|---|
| Element | Grass |
| Role | Tank |
| Starting rarity | Purple |
| Evolution line | Bonobean → Titanape → Grangutan → Primakong |
| Main utility | Piercing split projectiles, Banana Peels and frontline disruption |
| Main investment target | T3 Grangutan for self-healing |
| Overall assessment | Situational frontline option with stronger sustain at T3 |
Bonobean works best when a lane needs a durable unit that can also contribute damage to approaching groups. Its original banana hits a target ahead, then splits diagonally into two smaller piercing projectiles. The first target creates the split, so enemy spacing matters as much as Bonobean's own position.
Taking damage triggers a hiding phase in which it throws Banana Peels. Later evolutions improve its ability to survive this phase, but hiding does not make it invincible. A badly underlevelled Bonobean can still be defeated before its defensive tools make a difference.
Bonobean Skills and Evolutions
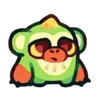
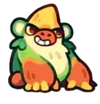
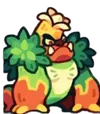
The four forms keep the same basic banana-and-peel playstyle. Their main differences are defensive: Titanape adds a DEF boost, Grangutan adds recovery and Primakong gains Aura: Grass.
Swipe or scroll horizontally to view the full table.
| Tier | Form | Skill | Main improvement |
|---|---|---|---|
| T1 | Bonobean | Green Bean | Splitting bananas and Banana Peels |
| T2 | Titanape | Fresh Peel | Adds Steady: DEF Boost |
| T3 | Grangutan | Grand Entrance | Adds self-healing to the defensive phase |
| T4 | Primakong | Jungle Star | Adds Aura: Grass while on the field |
Bonobean Tier Ranking
For general progression, the current recommendation is conservative. These are early guide ratings for investment value, rather than official rankings or a claim that every game mode has the same priorities.
Swipe or scroll horizontally to view the full table.
| Tier | Form | Early rating | Investment assessment |
|---|---|---|---|
| T1 | Bonobean | C | Functional, but low priority for a new account |
| T2 | Titanape | B | More durable; useful when a Grass Tank is needed |
| T3 | Grangutan | B | Better sustain, but still competes with established options |
| T4 | Primakong | Unranked | Evaluate the aura and account cost before committing |
Bonobean's specialised tank role does not automatically give it top-tier overall value. A new account may gain more progress from finishing its main attacker, healer or an already developed frontline. Grangutan becomes more attractive when survival in a specific lane is the problem holding the team back.
Best Placement for Bonobean
Start with Bonobean in a frontline slot near the centre of the board. A central lane gives its diagonal split projectiles the opportunity to travel toward both sides instead of immediately losing coverage beyond an outer edge.
There still needs to be an enemy in the main banana's path. Moving Bonobean to the centre is useful only if that lane provides suitable targets and the unit can survive there. If enemies spawn mainly on one side, protecting that threatened lane takes priority over theoretical projectile coverage.
Place healing and defensive support within range of Bonobean while keeping vulnerable attackers protected behind the frontline. Watch what happens when peels activate: if slipping enemies reach the backline faster, reinforce that approach or change Bonobean's position.
In Horde Invasion, leave useful space ahead for its summons. Its large banana can redirect enemies into neighbouring lanes, so those lanes also need enough protection. A safe lane for Bonobean can become an unsafe lane for the attacker beside it if the formation ignores that displacement.
Recommended Partners for Bonobean
The following partners cover needs created by Bonobean's kit. They are recommended pairings by role and skill interaction; the remaining slots should follow the stage's lanes and elemental requirements.


Bonobean Performance by Game Mode
Adventure and Chapters
Grangutan's self-healing is useful in extended waves where a frontline unit takes repeated damage. Split bananas add pressure against groups, especially when the central approach gives the smaller projectiles targets in neighbouring lanes.
The main limitation is clear speed. If the team survives comfortably but cannot defeat enemies quickly enough, upgrading Bonobean will often solve less than improving the main damage dealer.
Boss Challenge
Bonobean is a defensive option when survival prevents the team from completing a fight. Its split projectiles gain less value against an isolated boss, and its regular kit does not provide the offensive support of a dedicated buffer.
Use it when its survival tools keep the team fighting long enough to improve the result. When the frontline already survives, an extra damage dealer or offensive support is generally a better slot to test.
Horde Invasion
Horde Invasion gives Bonobean a much broader kit through skills unlocked at Lv.3, Lv.5 and Lv.7. These levels belong to progression within the mode and are separate from T1–T4 evolution.
Swipe or scroll horizontally to view the full table.
| Unlock | Effect | Practical value |
|---|---|---|
| Lv.3 | Attacks can launch an extra moldy banana that inflicts Poison | Extra damage and increased damage taken on affected targets |
| Lv.5 | Summons fruit that can merge from bananas into oranges and watermelons | Persistent area damage and Slicer: DEF Down |
| Lv.7 | Summons a large banana ahead; attackers receive Weak and can be knocked into another column | An extra body and enemy redirection |
At Lv.3, the preview shows a 50% chance to launch the extra banana. Poison deals damage over time and increases the target's damage taken by 5% for five seconds. This gives Bonobean some offensive support against enemies that survive long enough for allies to benefit.
At Lv.5, fruit appears at intervals of four to six seconds and deals damage every two seconds. The preview damage factors rise from 140% for a banana to 170% for an orange and 200% for a watermelon. Higher fruit forms increase coverage as well as damage, making room for fruit generation an important part of the setup.
At Lv.7, the large banana inherits 75% of Bonobean's maximum HP and 60% of its DEF and lasts for 14 seconds. Weak reduces an affected attacker's damage by 20%. Its value comes from absorbing pressure as well as changing enemy positions.
The Lv.7 skill also creates the biggest tactical risk. Moving an enemy into another column can change which units it threatens or pull it out of a damage dealer's preferred area. Forced-movement immunity can prevent the displacement, so check the encounter rather than planning around a guaranteed boss push.
Island Goldrush
Bonobean can be considered when a formation needs another unit to absorb damage, with T3 offering a stronger basis for longer fights. Its value depends on whether the recovery cycle has time to work and whether the opposing formation makes its movement effects useful.
For short fights, take care when replacing an established unit. Bonobean's defensive tools are less valuable if the battle ends before repeated recovery matters. Horde-exclusive fruit and large-banana skills should not be counted as part of its regular Goldrush kit.
Bonobean Evolution Priority
The following evolution trials are shown in the preview. Complete them alongside normal account progression rather than spending resources solely to rush a trial counter.
Swipe or scroll horizontally to view the full table.
| Target evolution | Preview trial requirements |
|---|---|
| T2 Titanape | Obtain 20 Shields through Pinball |
| T3 Grangutan | Gain three feeding stat upgrades; shoot 15,000 pinballs |
| T4 Primakong | Reach feeding quality B; shoot 45,000 pinballs; withstand 150 Horde Invasion waves |
Keep Bonobean at T1 While Testing
Use the original form to check its attack path and peel behaviour. If it has no regular place in the formation, save the upgrade resources for a unit that directly addresses the stage blocking progress.
Upgrade to Titanape for an Active Frontline Slot
T2 adds the defensive boost needed to make taking hits more manageable. Pursue it when Bonobean already protects an important lane, rather than simply because a new evolution is available.
Aim for Grangutan When Sustain Is the Goal
T3 is the most useful target for players deliberately building this line as a tank. The self-healing addresses sustained pressure in a way that its earlier forms cannot. Keep the account's main attacker and support developed alongside it so longer survival leads to actual clears.
Leave Primakong for a Developed Roster
T4 is a later decision based on Grass aura value, roster needs and available resources. A working T3 Grangutan gives you a practical point to reassess the investment before committing to the final evolution.
Is Bonobean Worth Upgrading
Bonobean is worth considering if your roster needs a Grass Tank with self-sustain and you can work around its enemy movement. T3 Grangutan is the clearest target for that purpose.
It is a lower priority if Serrabloom or another established frontline already handles the same job. New players should first secure enough damage and dependable support to clear stages. Horde-focused players can then test whether the fruit summons and large banana improve their particular formation before moving a large share of resources into the line.
Conclusion
Bonobean brings a different frontline option to Clash of Critters, combining diagonal banana attacks with damage-triggered defence and recovery. Grangutan is the key sustain upgrade, while Horde Invasion adds fruit merging and lane redirection that need careful positioning.
Ready to develop your next Tatari? Check out Clash of Critters top-ups at LDShop, find an offer that fits your budget and keep your evolution plans moving.






 TOP UP WITH DISCOUNT NOW

LDShop Team Experienced Game Editors
The LDShop Editorial Team covers game updates, character builds, team compositions, and practical gameplay guides. We follow official announcements, test game mechanics, and gather insights from gaming communities to provide accurate, useful, and easy-to-follow content. Our goal is to help players make informed decisions, save resources, and get more out of their favorite games.
