


Delta Force Season 10, Meltdown, dropped the biggest Operations map yet. AZ3 Nuclear Power Plant is huge, radioactive, and full of moving parts. We have spent hours running it solo and in squads, so this guide cuts through the noise. Here we break down the map layout, the radiation system, the Emergency Shutdown flagship mission, and the new H1000 boss fight.
If you jumped in and felt overwhelmed, you are not alone. AZ3 throws a live reactor event, a hunting boss, and a fresh keycard system at you all at once. Let’s follow LDShop, as we will walk you through everything that actually matters.
AZ3 Map Overview
AZ3 arrived with Season 10 on June 30, 2026. The map draws clear inspiration from Chernobyl, right down to the concrete sarcophagus over a melted reactor. It runs in both Easy and Normal modes, with no rotation, so you can play it anytime.
The map is roughly 1.5 times the size of Zero Dam. That extra space matters. Rotations take longer, so plan your extract route early.
|
Detail |
Easy Mode |
Normal Mode |
|---|---|---|
|
Match time limit |
30 minutes |
30 minutes |
|
Entry value |
None |
Around 112,000 |
|
Keycard durability |
40 uses |
20 uses |
|
Random extracts |
No |
Yes |
|
Signal-blocked areas |
None |
None |
One nice quality-of-life touch stands out. AZ3 has no blurred or signal-blocked zones on the map. You can read the full layout the entire round, just like Zero Dam.
Map Layout: Three Main Zones
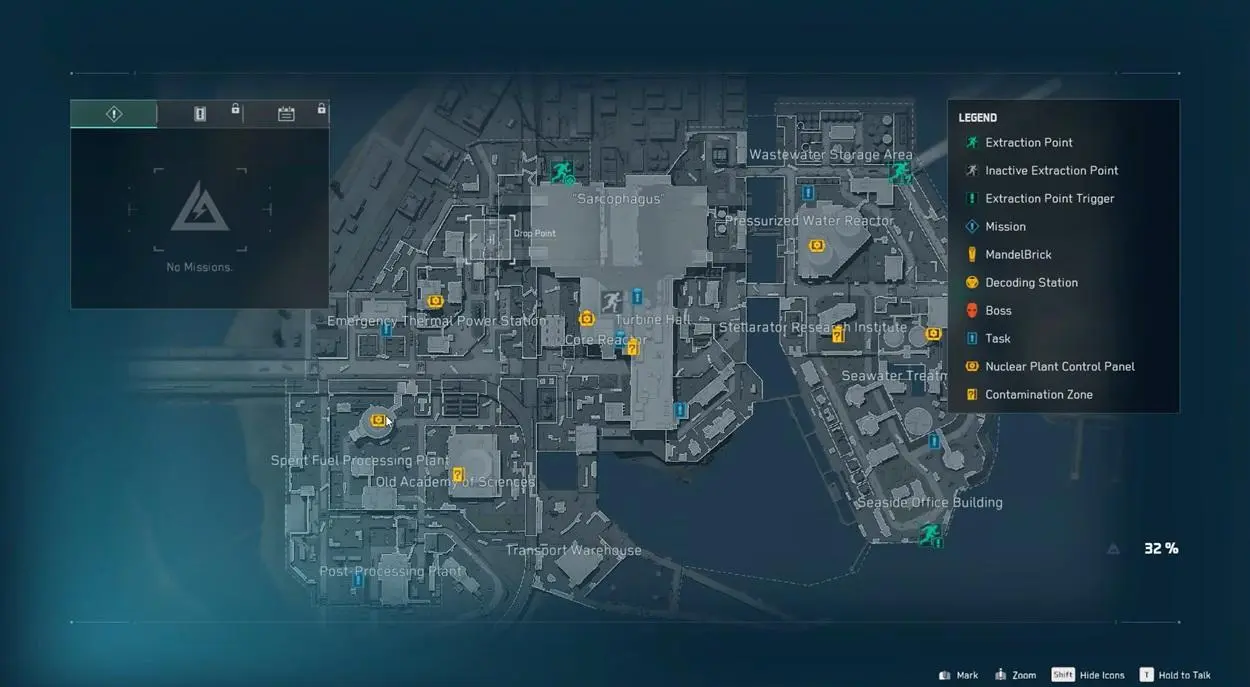
AZ3 splits into three big sections. Water and railway tracks separate them, so learning the crossing points saves real time.
- West Zone: Home to the Spent Fuel Processing Plant, the Academy of Sciences, and the emergency thermal power station. Lower player traffic and solid loot.
- East Zone: Holds the Research Institute, the Pressurized Water Reactor, and the wastewater storage area up in the northeast corner.
- Core Area: The central reactor complex with the sarcophagus dome, turbine hall, and the most valuable loot. This is also the boss zone.
Spawns work like Zero Dam. If you spawn West, you extract East, and the reverse holds too. Many buildings hide large underground sections, so do not treat the surface as the whole map.
The southern docks area deserves a mention. The water is fully swimmable, but it is radioactive. Yes, there are sharks in there, along with a few secret caves the community is still mapping out.
The Radiation System Explained
Radiation is the headline mechanic on AZ3. Certain zones and containers raise your radiation level while you stay near them. You move through four tiers in total, and the first one actually helps you.
|
Tier |
Effect |
|---|---|
|
Tier 1 |
Positive. Slightly faster container searches and minor screen effects. |
|
Tier 2 |
Occasional pain effects and character noise begin. |
|
Tier 3 |
Higher chance of wounds and fractures at random. |
|
Tier 4 (Max) |
Max health capped near 60. Natural decay stops completely. |
Here is the insight most guides skip. Below Tier 4, radiation decays on its own if you leave the hot zone. Once you max out, that natural decay stops. You then have to physically clean it off.
Decontamination rooms sit in each sector. Walk in, hit the button, and your rads drop fast. The tank units and hose operators can also wash you down, but they will chip your health while doing it. Standard painkillers do nothing against radiation, so pack the right meds.
Black Site Decontamination Upgrades
You can upgrade radiation tolerance outside of matches. The new Decontamination Chamber at your Black Site has three tiers. You unlock them using AZ3-exclusive items you extract with.
|
Upgrade Level |
Effect |
|---|---|
|
Tier 1 |
Decay delay drops from 15 seconds to 10. |
|
Tier 2 |
Radiation decays 20 percent faster. |
|
Tier 3 |
Decay is 50 percent faster and delay drops to 5 seconds. |
If you plan to farm AZ3 regularly, this upgrade path is worth prioritizing. Maxing it makes repeat runs far less punishing.
The Emergency Shutdown Flagship Mission
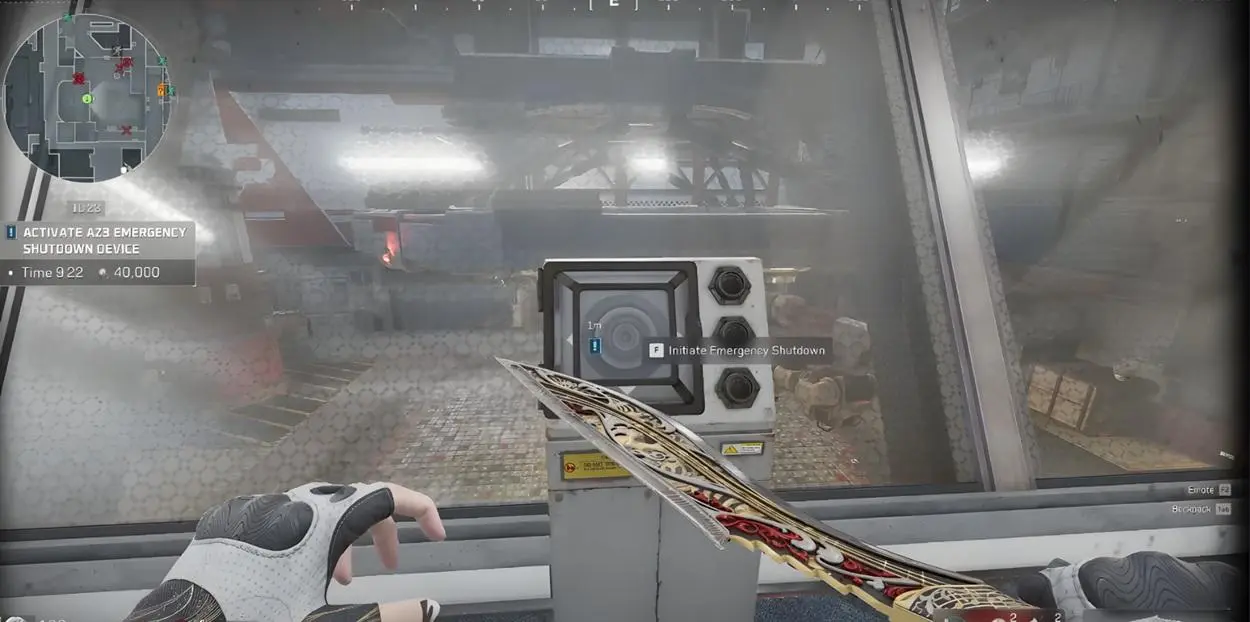
The flagship task is called Emergency Shutdown. It becomes available around 10 minutes into the match, and you get a window to claim it. From claim to extract, expect roughly 6 to 8 minutes.
The story here has weight. HAVVK ran reckless experiments inside the plant, and an old scientist called in G.T.I. to help shut the reactor down. You are that operator, walking in at the last minute.
Here is the full sequence we run:
- Claim the mission. It is marked on your map in the southern core area. Accept it there.
- Rescue the scientist. Head upstairs to the marked room and clear the enemies holding him.
- Follow him to the control room. He runs ahead, so stay close and clear the bots pouring through the doors.
- Grab the pass key. After he works the computer, pick up the key and use it on the tablet overlooking the reactor.
- Check the reactor core. Radiation spikes hard here. You shimmy down the side of the core, so watch your footing.
- Follow through the old reactor. Enemies swarm this stretch. Your radiation climbs to Tier 3 fast.
- Reach the rooftop finale. Talk to the scientist, then a cutscene plays and you parachute down.
You land badly hurt, often around 23 HP, with maxed radiation capping you near 60. Bring plenty of meds. After landing, search the fuel rods around you for rare loot like enriched uranium samples. A special extract point opens nearby with a 2-minute countdown.
Reactor Power and the Mid-Match Event
Separate from the flagship task, reactor power rises on your screen throughout the match. Certain interactions push it up or down, and the outcome shapes the whole round.
- Successful shutdown: Participating players earn extra loot, and the H1000 boss has weakened armor.
- Failed or ignored shutdown: Radiation spreads across the entire map. Safe areas turn hostile.
This creates a genuine squad decision, not just another loot marker. Decide early whether you are contesting the shutdown. If you commit late, you waste positioning and often lose the fight.
H1000 Boss Fight
H1000 is the new Warlord-level boss, and he breaks the old mold. Past bosses stood guard in one spot. H1000 actively hunts high-threat players, so he can find you when you least expect it. He spawns most reliably in the central core area near the turbine hall on Normal mode.
The fight runs three phases. Two clones come first, then the real boss.
|
Phase |
Enemy |
Notes |
|---|---|---|
|
1 |
H800 clone |
Looks identical, hits just as hard. |
|
2 |
H47 clone |
Heal and repair armor before he arrives. |
|
3 |
H1000 (main) |
Only appears after both clones fall. |
His kit is nasty. He carries an armor-piercing pistol, fires tranquilizer darts that stun if you fail to clear them, and lands a flying kick that instantly executes you. Never rush him or trade up close.
Our approach is simple. Stay in cover, keep medium to long range, and chip his health down. Stuns and flashes shut down his aggression well. Medic operators earn their keep here by clearing dart effects fast.
Killing him three times ends him for good. He drops his gun, his armor, a guaranteed red AZ3 key, and sometimes pass keys. The clones can also drop good loot on their own iterations, so search every body.
This fight punishes undergeared squads, so bring solid armor and enough meds. If you run low on coins for a proper loadout, a quick Delta Force top up keeps you stocked before you push the core. The best platform to make the top-up is LDShop, it lets players top up for less and it is a great way to save money.
Key Cards and Pass Keys
AZ3 removed the old buy-a-card-from-the-store system. Cards now spawn at fixed points across the buildings. There are seven keycards in total. One is red, and the rest are standard.
|
Key Card |
Location |
Notes |
|---|---|---|
|
Reactor Master Control Core (Red) |
Core area, top of reactor control |
40 durability, opens two doors |
|
Turbine Control Room |
Core area, above the reactor doors |
Standard 20-use card |
|
Railway Passage |
Central railway wall |
Access only, no loot room |
|
Spent Fuel Plant Server Room |
West Zone processing plant |
Stable Level 5 armor output |
|
Tokamak Data Center |
West Zone, Academy of Sciences upstairs |
High single-room value |
|
Stellarator Control Room |
East Zone research institute, downstairs |
Near the plant control panel |
|
Pressurized Water Reactor Server |
East Zone, upstairs |
Two rooms with extra containers |
The red card lasts longer because it opens two separate doors. The railway card only opens a shortcut, so do not expect loot behind it.
AZ3 Pass Keys
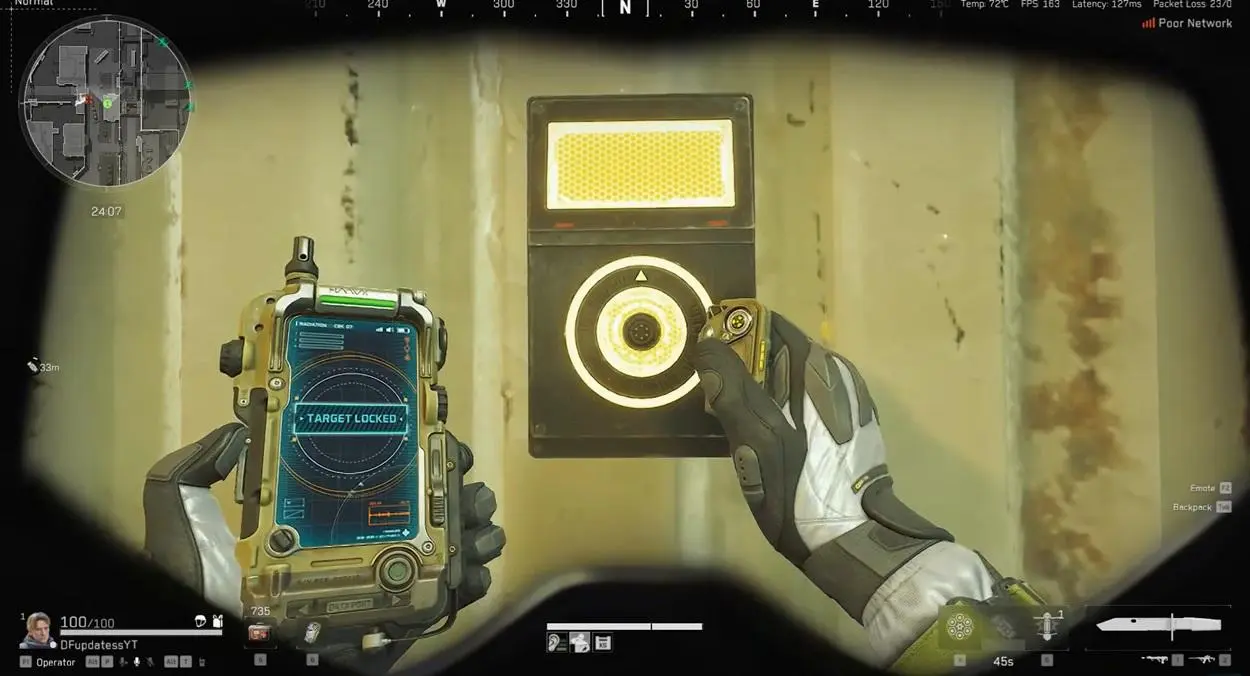
Pass keys are a separate system, and they are great for low-cost runs. You find them lying around, and they beep constantly, so follow the sound. Once picked up, a scanner points you to the exact room it opens.
- Pass keys open one specific door only. Do not carry one across the map.
- Rooms often hide a higher-tier pass key inside, creating a chain.
- Pass keys cannot be extracted. Use them in that round or lose them.
That chain mechanic is the real value. A lower-tier room can hand you a better key, which leads to even richer loot.
Extraction Methods
Extraction feels familiar to Zero Dam veterans, but the big map size changes your timing. All extracts except the flagship one are live from the start.
|
Extract Type |
How It Works |
|---|---|
|
Permanent |
Walk in, 10-second timer, no player limit. |
|
Random |
Green smoke marks it, appears at random times on Normal. |
|
Bagless |
Drop your backpack to use it. One version is a submarine escape. |
|
Paid |
Four seats, 30-second timer. Easy costs 10k per seat, Normal 40k. |
|
Emergency Shutdown |
Opens after the flagship mission, 2-minute countdown. |
Your available extracts depend on your spawn side. On Easy, your side gives two permanent extracts plus a bagless option. On Normal, one of those permanents becomes a random extract instead. The paid and flagship extracts stay open to everyone.
Loot Highlights Worth Chasing
AZ3 packs some of the best rewards in the game right now. A few items stand above the rest.
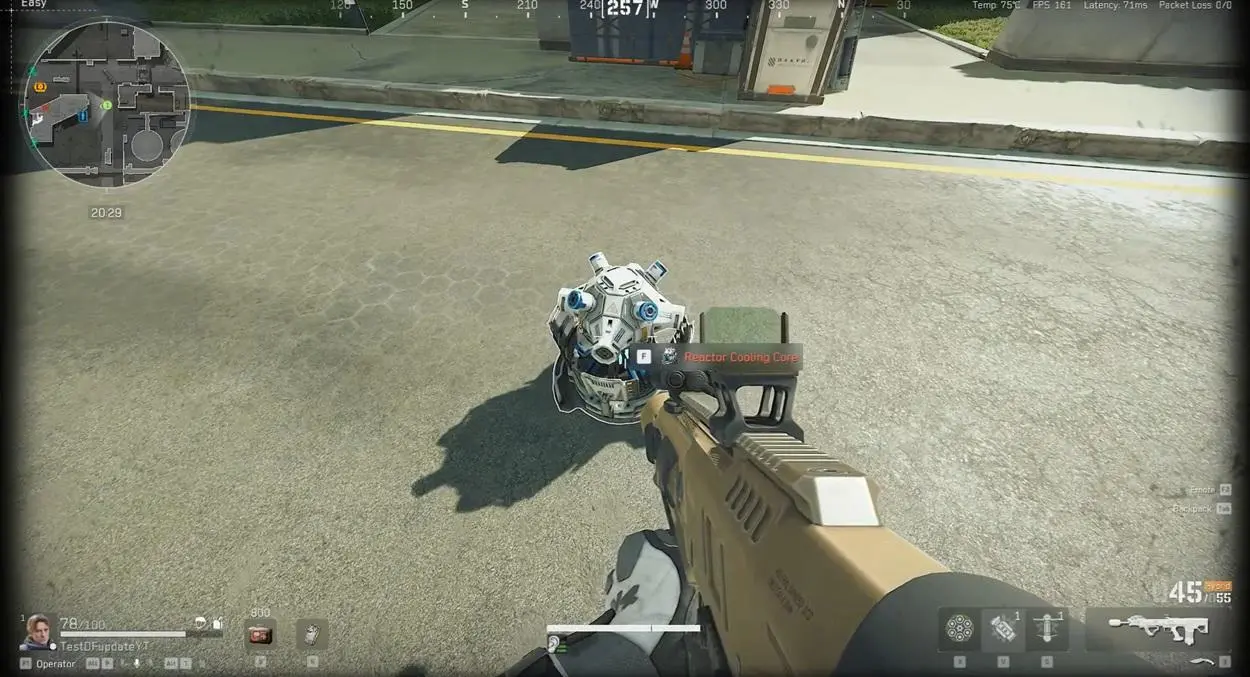
- Reactor Cooling Core: The AZ3-exclusive red item. It is a 3 by 3 piece, so it fits neatly in a 3 by 3 safe box.
- Black Key Card: Opens any keycard door on the map for free. It cannot be extracted, so use it that round.
- Reactor Control Panels: Five sit across the map. Loot them early for a shot at the cooling core.
- Special Containers: Bosses, snipers, shield bearers, and water-cannon units carry a second hidden container. Search both.
Those special containers can hold collectible poker cards and black key cards. Always kill and fully search special enemies when you get the chance.
Our Pro Tips for AZ3
A few habits separate a clean run from a wiped squad. These come from a lot of trial and error.
- Learn AZ3 on Easy first. Map the radiation zones and decontamination rooms before spending a Normal entry fee.
- Overpack anti-radiation meds and treat a gas mask as mandatory, not optional.
- Do the shutdown before fighting H1000. Weakened armor makes the boss far easier.
- Watch the reactor timer with your squad. Commit to a plan early to avoid wasted rotations.
- Do not loot mid-boss-fight. Heal and reposition between phases instead.
Conclusion
AZ3 is easily the most ambitious map Delta Force has shipped. It layers a four-tier radiation system, a live reactor event, a hunting boss, and a chained keycard economy into one location. That complexity rewards squads who plan and punishes anyone who wanders in blind.
Take it slow, learn the crossings, and respect the radiation. Once the systems click, AZ3 becomes one of the most rewarding maps in the game. We will see you in the exclusion zone.





 TOP UP WITH DISCOUNT NOW
Edmund G. Kolis Experienced Game Editor
I'm a game guide writer with over 20 years of experience playing all types of games, especially anime-style RPGs, gacha and sports games. I love finding smart ways to beat tough levels without spending too much money. By studying game mechanics and character systems, I create easy tips to help players save time and resources. When I'm not gaming, I watch anime to get inspiration for strategies. My goal? To help you enjoy games more and stress less – even when facing "impossible" bosses! Let’s make gaming fun and affordable together!
