


Superconduct has been quietly sitting at the bottom of Genshin's reaction tier list for years. Low damage, limited scaling, and no real dedicated carry to make it shine. That changes in Version 6.7, when Sandrone — the Marionette, Seventh of the Eleven Fatui Harbingers — finally becomes playable. Her kit doesn't just upgrade Superconduct. It introduces an entirely new reaction called Stella Superconduct, designed from the ground up to deal real, meaningful damage.
This guide covers everything currently known about Sandrone: her kit and how Stella Superconduct works, all ascension and talent materials, constellation breakdown, and the team comps shaping up around her.
Best Sandrone Builds
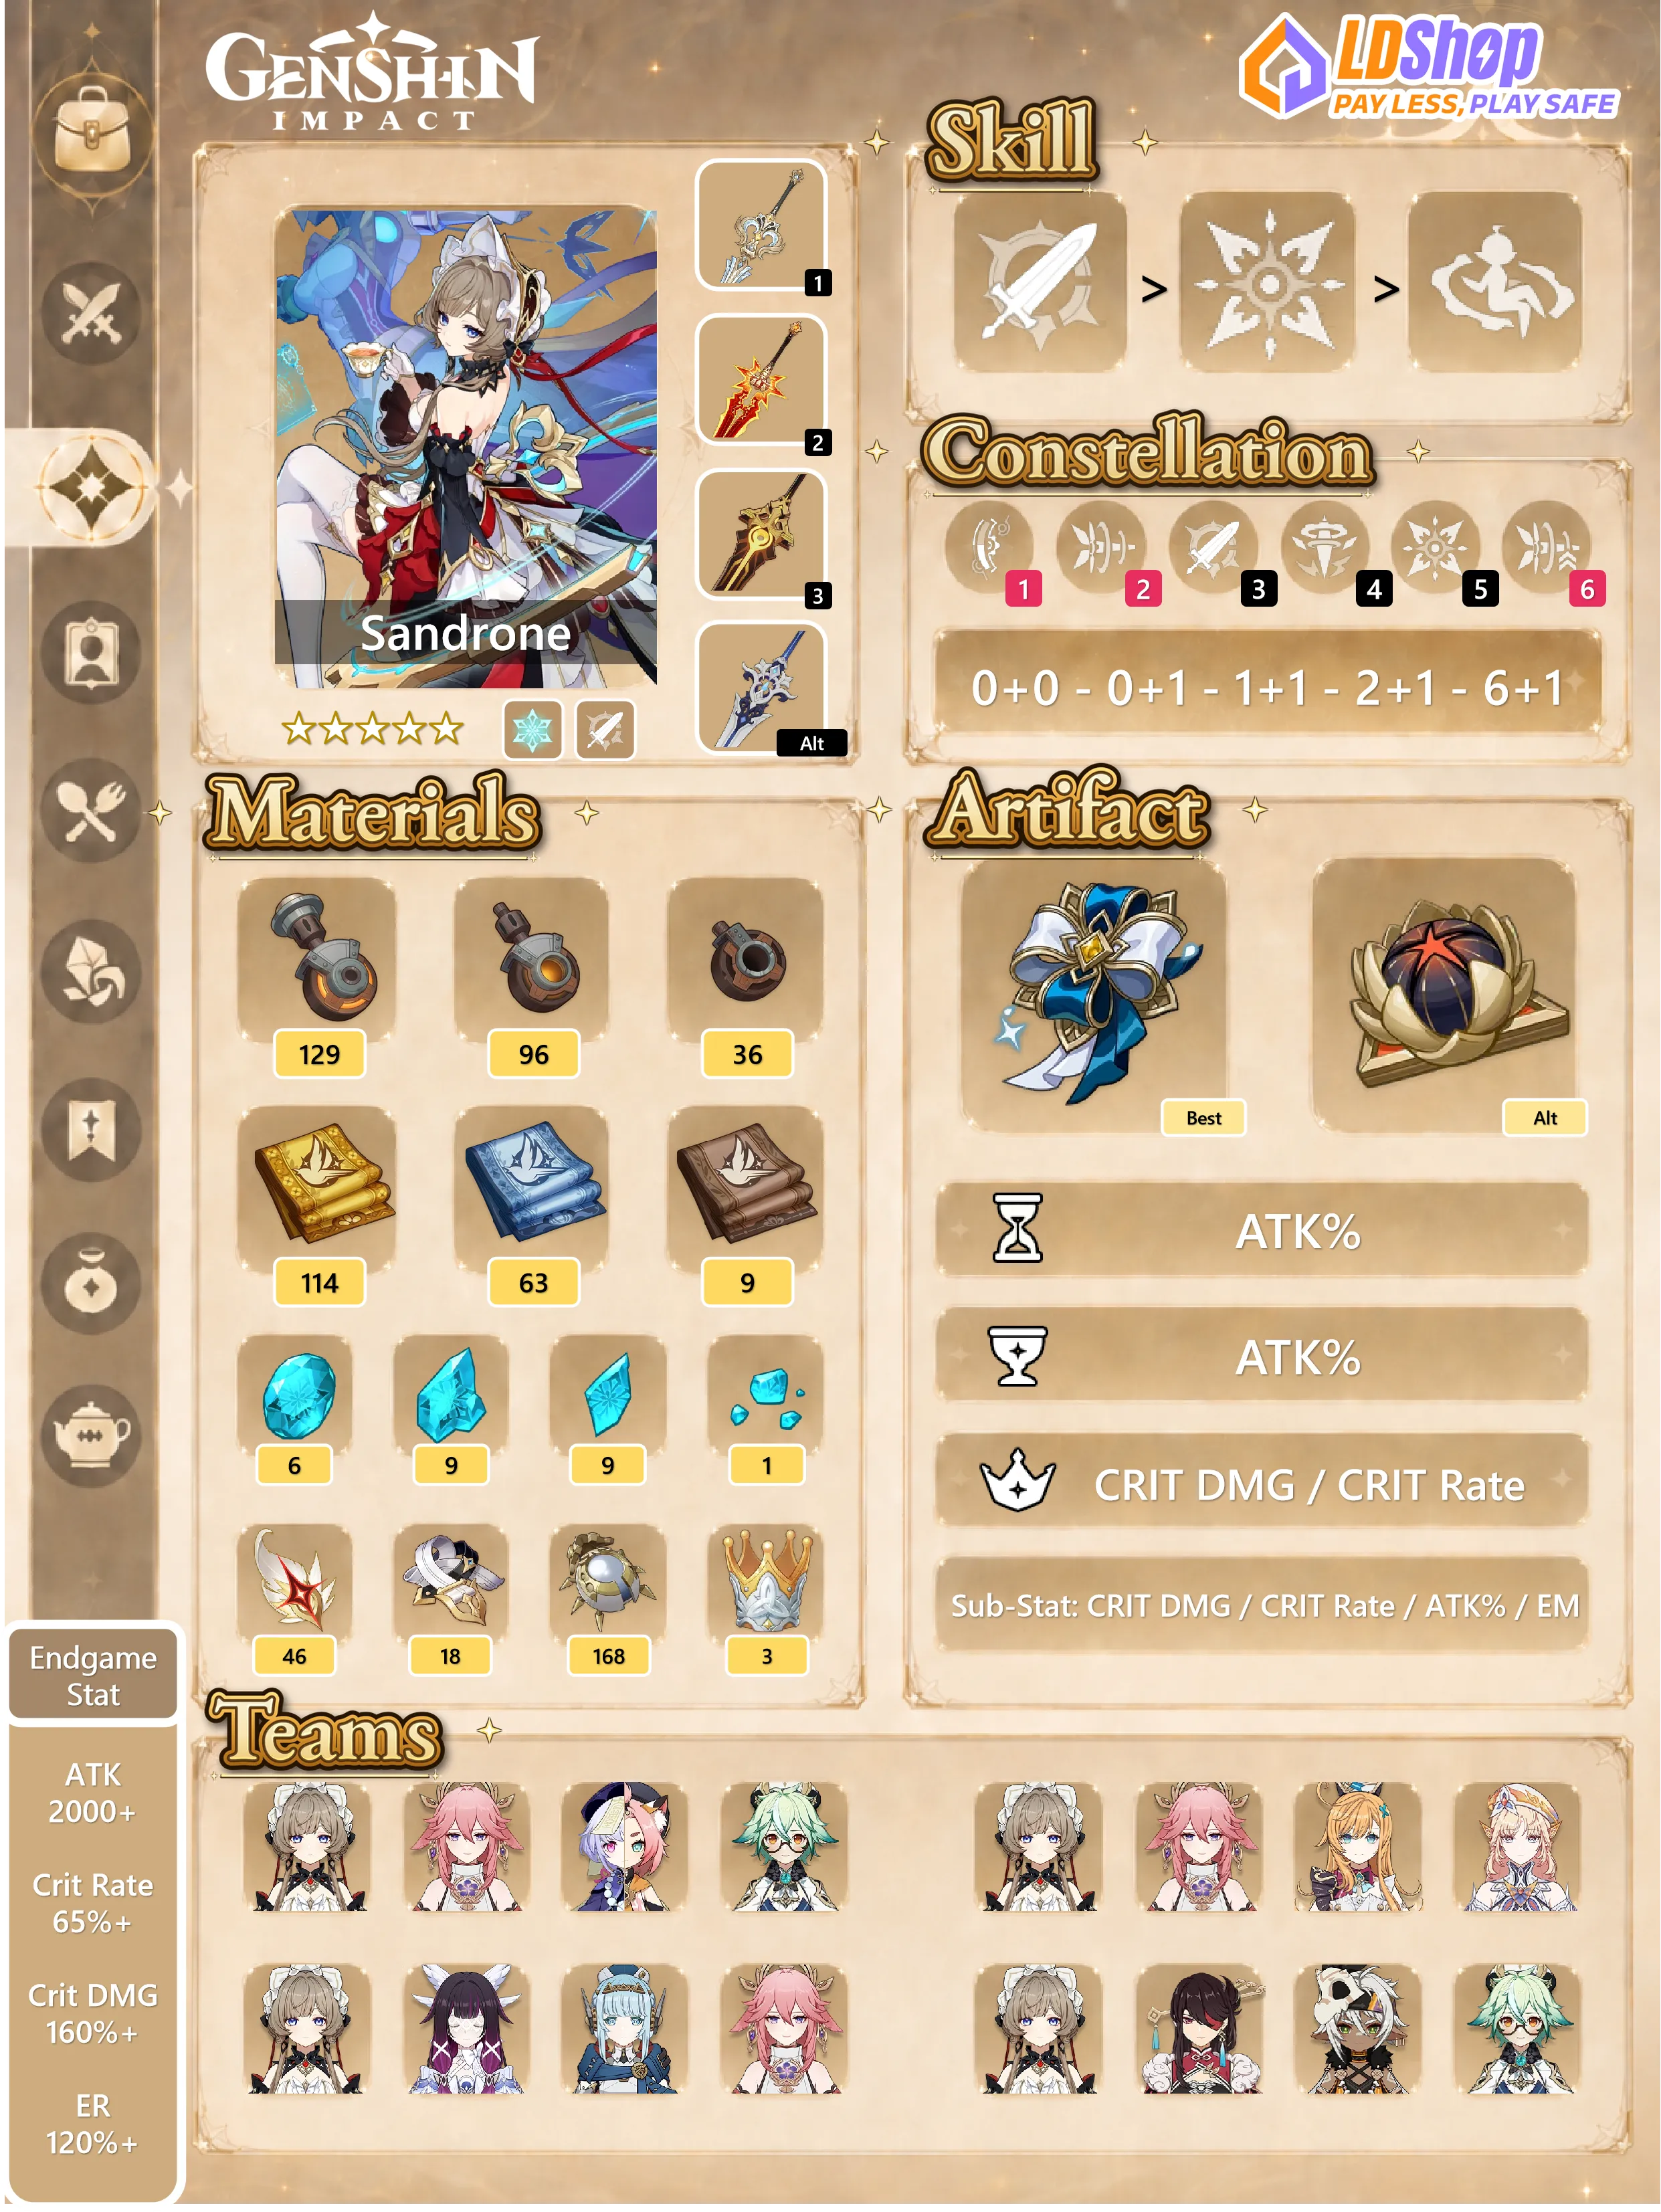
Here is the best Sandrone builds summary, you scroll up for more details!
Sandrone Overview
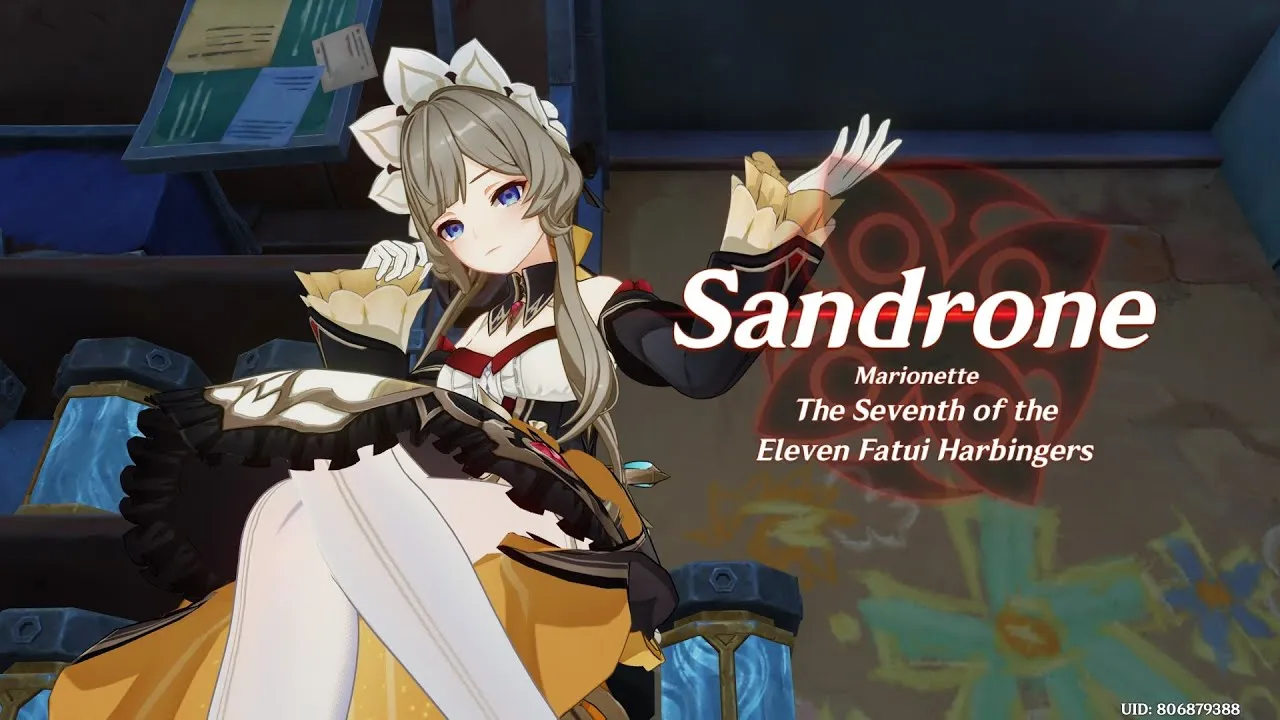
Sandrone is a 5-star Cryo Claymore character and the first unit specifically built around the new Stella Superconduct reaction. Her design reflects her lore — a Fontaine-engineered automaton with a wind-up key on her back, piloting a massive autonomous machine called Fageo in combat. Her role is on-field Cryo DPS, spending charged attacks in Calculation Mode to build stacks that eventually unleash high-damage Stella Superconduct bursts.
|
Rarity |
5★ |
|
Element |
Cryo |
|
Weapon |
Claymore |
|
Role |
Main DPS / Stella Superconduct Trigger |
|
Expected Release |
Version 6.7, Phase 1 (July 1, 2026) |
Sandrone's Kit
Sandrone's gameplay revolves around a mechanical companion named Fageo and a two-stage power system: Calculation Mode (charging up) and Overclock Mode (releasing damage). The core loop is relatively straightforward, but the Stella Superconduct system underneath it has some depth worth understanding before you build her.
Normal, Charged, and Plunging Attacks
Her normal attack string performs three consecutive claymore slashes — functional but not the focus of her kit. Where things get interesting is her Charged Attack, which summons Fageo into Calculation Mode. In this state, Fageo continuously fires Condensation Rays that deal AoE Cryo damage, and crucially, this damage counts as Superconduct reaction damage. As the rays hit, they accumulate Calculation Power. When power maxes out, Fageo enters Overclock Mode, firing enhanced blasts before the power drains back down and the cycle repeats. Her plunging attack is standard, dealing AoE damage on landing.
Elemental Skill — Tactical Hover
Sandrone's Skill puts her on a tactical hover device for 6 seconds, during which she can control direction freely. Pressing sprint enters a high-speed mode that burns stamina (10 to enter, 15 per second to sustain). When the hover activates, enemies nearby trigger a Prismatic Resonance Cannon — two Prism Shells fire toward enemies, with the second dealing Cryo damage counted as Stella Superconduct reaction damage. The hover also doubles as a reset mechanic: mounting reduces Fageo's Calculation Power by 40, with an additional 10 per 0.1 seconds during the ride. This lets you control the Overclock cycle and avoid entering Overclock Mode at the wrong moment in your rotation.
Elemental Burst — Subzero Convergence
Sandrone's Burst summons a wave of Prismatic Resonance Cabbribs (her aerial bombing drones) that carpet the area ahead, followed by a Subzero Convergence Beam that hits enemies and deals AoE Cryo damage. At C6, this sequence becomes dramatically more powerful, with each laser tick capable of firing multiple instances of Stella Superconduct damage depending on Calculation Power state.
Passives
|
Passive |
Effect |
|
Stella Conversion |
All Superconduct reactions become Stella Superconduct while Sandrone is in the party |
|
ATK Scaling Buff |
+0.7% Stella Superconduct base DMG per 100 ATK (max 14%) |
|
Calculation Reset |
Elemental Skill reduces Fageo's Calculation Power for rotation control |
|
QoL Passive |
Extra tea snack rewards when turning in commissions to Katheryne |
Talent Priority
Sandrone's damage output comes primarily from Calculation Mode and her Charged Attack. Talent investment should follow that order:
- Normal Attack (Highest) — this governs Calculation Mode and Overclock Mode damage, making it Sandrone's primary source of Stella Superconduct hits.
- Elemental Burst (Second) — the Subzero Convergence Beam deals meaningful damage and is important for C6 rotations.
- Elemental Skill (Last) — the Skill's value is mostly mechanical (resetting Calculation Power) rather than a major damage source.
Sandrone Materials
Good news for players planning ahead: Sandrone's ascension materials pull from the Vagrancy talent book domain that already exists, and the Drive Shaft enemy drops are pre-farmable now. The new materials — Plume of the Fallen Watcher and Subdetection Unit — will arrive with 6.7's regional content.
Ascension Materials (Level 0–90)
|
Material |
Total Amount |
|
Mora |
2,092,600 |
|
Subdetection Unit (Local Specialty) |
168 |
|
Wanderer's Advice |
3 |
|
Hero's Wit |
418 |
|
Shivada Jade Sliver |
1 |
|
Shivada Jade Fragment |
9 |
|
Shivada Jade Chunk |
9 |
|
Shivada Jade Gemstone |
6 |
|
Broken Drive Shaft |
18 |
|
Reinforced Drive Shaft |
30 |
|
Precision Drive Shaft |
36 |
|
Plume of the Fallen Watcher |
46 |












Talent Materials (Triple Crown)
|
Material |
Single Talent (Lv.10) |
Triple Crown |
|
Mora |
1,625,500 |
4,957,500 |
|
Crown of Insight |
1 |
3 |
|
Teachings of Vagrancy |
3 |
9 |
|
Guide to Vagrancy |
21 |
63 |
|
Philosophies of Vagrancy |
38 |
114 |
|
Broken Drive Shaft |
6 |
18 |
|
Reinforced Drive Shaft |
22 |
66 |
|
Precision Drive Shaft |
31 |
93 |
|
Madman's Restraint |
6 |
18 |






The Vagrancy books can be farmed from the existing domain on Tuesday, Friday, and Sunday. Drive Shaft enemies are already in the world. The weekly boss material remains unconfirmed — leakers expect it to come from a new 6.7 boss, so check back closer to release for farming details.
Sandrone Weapon
Sandrone Signature Weapon

A Teaspoon of Transcendence (Lv. 90)
Rarity: 5-star | Base ATK: 674 | CRIT DMG: 44.1%
Passive (R1): ATK is increased by 28%. Additionally, each time the equipping character hits an opponent with their Charged Attack, they attain "Transcendence" for a short time: their Stellar-Conduct DMG is increased by 16% for 5s. This effect can stack once every 0.2s, up to 3 stacks.
This is Sandrone's clear best-in-slot weapon and it isn't close. The passive stacks up naturally through her Charged Attack loop, meaning she can maintain close to permanent uptime on the full Stellar-Conduct DMG bonus. At R1, it already outperforms every other 5-star option. If you plan to pull Sandrone seriously, pulling her signature is worth prioritizing over her early constellations.
Alternative Weapons

Wolf's Gravestone
Rarity: 5-star | Base ATK: 608 | ATK%: 49.6%
Passive (R5): Increases ATK by 20%. On hit, attacks against enemies with less than 30% HP increase all party members' Base ATK by 40% for 12s. Can only occur once every 30s.
Wolf's Gravestone is the best alternative for players who don't have the signature weapon. Its enormous ATK% substat directly feeds Sandrone's Stellar-Conduct scaling, and the passive team ATK boost adds extra team value. It's a reliable stat stick that keeps her damage competitive.

Tidal Shadow
Rarity: 4-star | Base ATK: 565 | ATK%: 27.6%
Passive (R5): After the character equipping this weapon heals a party member, the equipping character's ATK is increased by 48% for 8s. This can trigger even when the character is not on the field.
Sandrone's best free-to-play option. It's craftable, easy to refine to R5, and provides a strong ATK% boost that directly converts to more Stellar-Conduct damage. Any team running a healer (which Sandrone generally wants anyway) can keep the passive reliably active.
Note on weapons to avoid: Pure elemental DMG Bonus% passives — including Serpent Spine's DMG% scaling — do not apply to Stellar-Conduct damage. This makes several normally strong Claymore DPS weapons significantly weaker on Sandrone than they would be on traditional physical or elemental carries.









Sandrone Artifact
Best-in-Slot Artifact Set

Disenchantment in Deep Shadow
2-PIECE SET ATK +18%.
4-PIECE SET Increases Superconduct Reaction DMG by 80%. When the equipping character attacks opponents affected by Superconduct, this attack's CRIT Rate is increased by 16%. An all-new blessing may be obtained as you make your way toward Snezhnaya...
This is Sandrone's BiS set and it isn't really a competition. The 4-piece bonus directly amplifies Stellar-Conduct damage and stacks an additional 16% CRIT Rate on top — which pairs especially well with Cryo Resonance (+15% CRIT Rate against Cryo-affected enemies) to push her CRIT Rate to comfortable levels without sacrificing offensive substats elsewhere. The hidden passive tied to Snezhnaya content also hints at future scaling for Stellar-Conduct teams, meaning this set likely gets stronger as more supports release.
Run a 2+2 ATK/EM combination as a stopgap while farming for the full 4-piece.
Alternative Artifact Set
 Blizzard Strayer (4-piece)
2-PIECE SET Cryo DMG Bonus +15%.
4-PIECE SET When a character attacks an opponent affected by Cryo, their CRIT Rate is increased by 20%. If the opponent is Frozen, CRIT Rate is increased by an additional 20%.
Blizzard Strayer is a reasonable bridge set and remains strong in freeze-adjacent situations, but it cannot match Disenchantment in Deep Shadow's Stellar-Conduct-specific bonuses once you're past the early farming stage. Farm it only as a temporary measure.
Sandrone Pull Recommendation
Constellation Overview
 |
Morrow After the Golden Dusk When in Decoding mode, Fagio's Decoding Power increases at a 50% lower rate, and all party members deal 30% increased Stellar-Conduct DMG. |
 |
An Heiress Gazed Into the Looking-Glass While in Radiance: Stellar-Conduct state, increases CRIT DMG from Charged Attack condensed beams by 40%. Additionally, each time a beam is fired, CRIT DMG dealt by all condensed beams during this Decoding mode period is further increased by 20%. Max 3 stacks. |
 |
Refuse the Wake of Dusk, the Moonlit Yoke Increases the Level of Normal Attack (Formule Phenomenale: Self-Evident Proposition) by 3. Maximum upgrade level is 15. |
 |
In Knowledge Lies the World's True Ground When Sandrone deals Stellar-Conduct DMG to an opponent, she also summons an extra Prismatic Resonance Cannon to fire a coordinated attack dealing Cryo DMG at 125% of her ATK. This DMG is counted as Stellar-Conduct DMG. Triggers once every 4s. |
 |
Of All Beside, She Takes No Part Increases the Level of Elemental Burst (Formule Phenomenale: Q.E.D.) by 3. Maximum upgrade level is 15. |
 |
Narcissus Wakes, Her Eyes Upon the Dawn When Fagio fires a condensed beam for the third time while in Decoding mode, the beam becomes a more powerful Condensed Cluster Beam that fires continuously. This beam deals up to 4 additional instances of AoE Cryo DMG at 100% of Sandrone's ATK. While in Radiance: Stellar-Conduct state, the Condensed Cluster Beam instead deals 4 additional instances of AoE Cryo DMG at 80% of Sandrone's ATK, counted as Stellar-Conduct DMG. Additionally, all Stellar-Conduct DMG dealt by Sandrone is elevated by 20%. |
Constellation Recommendation:
- C0 is fully functional — Complete Spiral Abyss clears are achievable at base with the right team and artifacts.
- C0 + Signature Weapon — The consensus best early investment. A Teaspoon of Transcendence adds more damage than C1 or C2 alone, and many calculations place it ahead of her early constellations as the first premium upgrade to chase.
- C2 — The best-value constellation stopping point. The extra ATK scaling on Condensation Rays is a substantial damage jump and the most impactful early constellation.
- C4 — Adds a reliable coordinated attack every rotation, noticeably increasing sustained output.
- C6 — The standout ceiling investment. The Clustered Condensation Ray upgrade dramatically increases her DPS in Calculation Mode. Worth it for players committed to maximizing her long-term.
C1 and C5 are underwhelming compared to the surrounding options and not recommended as stopping points.
Signature Weapon vs. C2?
For most players, the signature weapon is the better first investment. A Teaspoon of Transcendence provides a bigger performance boost than C2 alone, and the CRIT DMG substat helps with overall stat balance. If Primogems are limited, consider pulling C0 + signature weapon and evaluating constellations afterward. C2 remains a strong upgrade when you do return to constellation investment.
Sandrone Team Composition
Sandrone's teams are built around one thing: consistent Cryo + Electro application to sustain the Stellar-Conduct reaction. She needs reliable off-field Electro so she can stay on-field and keep firing Condensation Rays, plus Cryo support to maintain reaction conditions and buff her output. Pyro characters are generally excluded since they interfere with the elemental conditions Stellar-Conduct requires — notable exception being Nicole, whose ATK buffing role doesn't disrupt the reaction economy despite being Pyro.
| Team 1 (Premium) | Team 2 (Versatile) | Team 3 (F2P-Friendly) |
|---|---|---|
|
Sandrone |
Sandrone |
Sandrone |
|
Yae Miko |
Raiden Shogun |
Fischl |
|
Qiqi |
Nicole |
Qiqi |
|
Citlali |
Fischl |
Sucrose |








Team 1 (Yae Miko Core): This is the current highest-damage ceiling setup. Yae Miko's off-field Sesshou Sakura towers provide consistent Electro application with zero on-field time required, which is exactly what Sandrone needs to keep Stellar-Conduct running while she holds the field. Qiqi or Escoffier double down on Cryo application and provide healing to keep Sandrone safe during long Charged Attack windows.
Team 2 (Raiden Shogun Core): Raiden's Burst mode Electro damage pairs well with Sandrone, and her energy restoration ability helps with team sustainability. Nicole provides an ATK buff and Pyro shield without disrupting the Cryo/Electro balance. This team performs particularly well in Version 6.7's Phase 2 window when Raiden reruns alongside Citlali.
Team 3 (F2P Flexible): Fischl's Oz provides steady off-field Electro comparable in frequency to Yae Miko at a fraction of the Primogem cost. Qiqi or Diona handle healing and additional Cryo application, while Sucrose brings Viridescent Venerer shred and Elemental Mastery buff. This setup is fully farmable and performs well in Spiral Abyss.
Pro tip: Save up to 35% on your game top-ups — log in to LDShop for discounts now!






 TOP UP WITH DISCOUNT NOW
Sylune Experienced Game Editor
Sylune is a senior game editor at LDShop.gg, specializing in in-depth coverage of RPG and strategy games. With a strong focus on titles like Wuthering Waves, Honkai: Star Rail and Whiteout Survival, she combines industry insight with firsthand player experience to deliver clear, informative, and actionable content. Her work is dedicated to helping gamers make smarter decisions—whether it’s understanding new updates or optimizing their in-game strategy.
