


While the limited-time characters of Star Rail can still be played with E0S0, the real excitement comes from pulling signature Light Cones or Eidolons. Today, LDShop will take a look at the most worthwhile signature Light Cones and Eidolons.
The most worthwhile Signature Light Cones
Top5: Lies Dance on the Breeze
Effect:
- Increases the wearer's SPD by 18%. After the wearer uses an attack, there's a 120% base chance to inflict "Bamboozle" on every enemy.
- While under "Bamboozle", enemies have their DEF decreased by 16% for 2 turns. If the wearer's SPD is higher or equal to 170, there's a 120% base chance to inflict "Theft" on every enemy.
- While under "Theft", enemies have their DEF decreased by 8% for 2 turns. When "Bamboozle" or "Theft" is repeatedly inflicted, only the recently inflicted instance takes effect.
Reason:
This effect is highly versatile, reducing the DEF of all enemies without needing to hit them directly, just using the attack is sufficient.
As a highly versatile Light Cone, its core advantages lie in boosting SPD and applying a DEF reduction effect to all enemies after launching an attack. The potency of this effect is comparable to an enhanced version of "Resolution Shines As Pearls of Sweat." It is well-suited for supportive Nihility characters such as Cipher, Silver Wolf, Fugue, and Pela.
Top4: Into the Unreachable Veil
Effect:
- Increases the wearer’s CRIT Rate by 12%. When the wearer uses Ultimate, increase the Skill and Ultimate DMG dealt by the wearer by 60%, lasting for 3 turns.
- After the wearer uses Ultimate, if this instance of Ultimate consumed 140 or more Energy, recovers 1 Skill Point.
Reason:
It provides The Herta CRIT Rate and increases the damage of her Skill and Ultimate, both of which are her main sources of damage. It also gives her some SP recovery.
This Light Cone is flexible and can be used by any Erudition DPS that does damage through their Skill and Ultimate. Characters who rely on Break Effect cannot use this since it provides nothing for Break DMG.
The Herta without this Light Cone may run out of points when using E-Q-E combos, preventing them from using their Ultimate.
Top3: Long May Rainbows Adorn the Sky
Effect:
- Increase the wearer’s SPD by 18%. When the wearer uses Basic ATK, Skill, or Ultimate, consumes all allies’ HP equal to 1% of their current HP.
- When the wearer’s memosprite uses its Skill, increase the DMG taken by all enemies by 18% for 2 turns. Effects of the same type cannot stack.
Reason:
This Light Cone is great for Support Remembrance characters who could heal and benefit from the SPD boost the Light Cone provides.
This Light Cone provides Hyacine with SPD, which she needs to utilize her Bonus Ability. This Light Cone also allows her to deal extra damage.
Increasing the DMG taken by all enemies when the memosprite uses their skill is also great since it allows Hyacine to provide a useful debuff for the team instead of just being a healer.
This allows you to stack Acheron‘s Slashed Dream. It can also drain all enemies’ HP to stack layers for Blade, stack Syzygy for Jingliu, and gained points of “Newbud” for Castorice, as well as allowing Castorice to summon Netherwing faster.
If your team’s characters do not need SPD or can’t utilize the Light Cone’s HP consumption effect properly, then other Light Cones would be better for them.
Top2: Thus Burns the Dawn
Dispossession:
The wearer's base SPD increases by 12. When dealing DMG, ignores 18% of the target's DEF. After the wearer uses Ultimate, gains "Blazing Sun," which is removed at the start of the turn. While holding "Blazing Sun," increases the wearer's DMG dealt by 60%.
Key Mechanic
Permanent Buffs:
- SPD Boost: Permanently increases the wearer's base SPD, improving action frequency.
- DEF Ignore: Ignores a portion of the target's DEF when dealing damage, enhancing overall damage output.
Burst Buffs: After using Ultimate, grants the "Blazing Sun" state, which significantly increases the wearer's DMG dealt. Lasts until the start of the wearer's next turn. This creates a short but powerful damage window, ideal for follow-up attacks or high-damage skills after unleashing the Ultimate.
This is an exceptionally powerful 5-star Light Cone for the Path of Destruction, offering comprehensive mechanics and explosive potential.
- The SPD stat is highly valuable for optimizing action cycles.
- DEF ignore is a top-tier damage multiplier with broad applicability.
- The massive DMG boost after using Ultimate makes it ideal for burst-oriented strategies, particularly for characters whose Ultimates enhance subsequent attacks or who can execute multiple hits during the burst window.
Boasting the highest base ATK stat (687) at the maximum level in the current version, it also provides DEF ignore and DMG amplification, significantly elevating Phainon's damage ceiling. While the Path of Destruction offers numerous Light Cone options that can ensure Phainon's baseline performance, his signature Light Cone additionally grants base SPD, which reduces the action value cost of his Ultimate, enabling him to take more actions within a single cycle.


Top1: Thus Burns the Dawn
Effect: Increases the wearer's Max HP by 30%. When the wearer or their memosprite loses HP during their own turn, the wearer gains "Death Flower," which allows the wearer and their memosprite to ignore 30% of the target's DEF when dealing DMG, lasting for 2 turns.
Reason:
Make Farewells More Beautiful is a great Light Cone for DPS Remembrance characters who scale with max HP and can benefit from the DEF ignore the Light Cone provides. Characters and Memosprites with the mechanic of losing HP in their kit find great value in this Light Cone.
Make Farewells More Beautiful is amazing for Castorice since the Light Cone provides her Max HP, DEF ignore for her and her Memosprite, and advances her action when her Memosprite disappears. The DEF ignore is a great DMG increase for both Castorice and her Memosprite.
It provides Castorice with a boost, allowing her to cast combat skills and deal damage faster and recharge her talents.
Castorice is a character with a memory of destiny, and there are few alternatives to lower-tier Light Cones.
The two major Nameless Honor Battle Passes, Flower Will Not Forget and More Sweat, Less Tears, require time to superimpose.
The most worthwhile Eidolons
Top5: Evernight E1
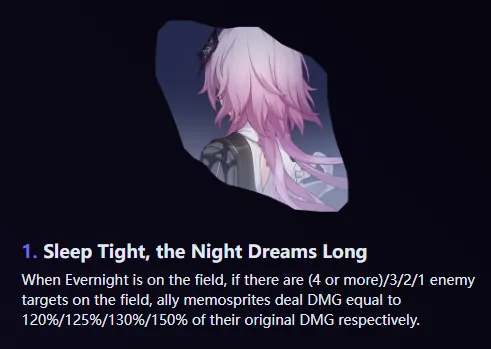
E1: Increases the damage dealt by all ally memosprites proportionally based on the number of enemies on the field, providing a significant boost in single-target scenarios (up to 150%). This Eidolon belongs to an independent damage multiplier category, directly increasing the memosprites' damage output based on the original value. The boost is dynamically adjusted according to the number of enemies, and it immediately escalates to the next tier when enemies are defeated. For example, in a scenario with 1 boss and 4 minions, the moment a minion is defeated, the damage multiplier instantly rises from 120% to 150%.
However, it only applies to memosprites and does not enhance the character's own damage. While Evernight as a solo carry receives the full benefit, teams like Castorice's have other damage components, resulting in an overall team damage increase of around 20-30%. As a multiplier category, it remains undiluted by DMG Boost multipliers. The effect activates in real-time—when minions are cleared, the multiplier and damage of ally memosprites are instantly raised. When combined with Tribbie's E1, the "overkill" damage can still generate True Damage applied to the boss enemy.
Top4: Phainon E2
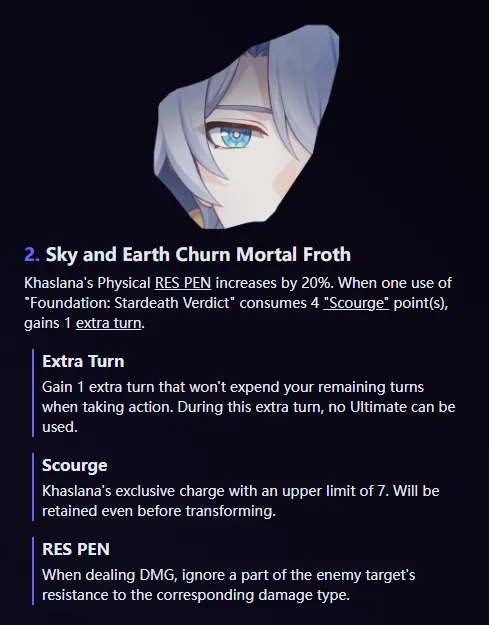
E2 Phainon gains 20% Physical RES PEN, significantly boosting his damage output. Additionally, using "Foundation: Stardeath Verdict" while consuming 4 "Scourge" points grants him 1 extra turn.
While an E0 Phainon might require two Ultimates to defeat an enemy, an E2 Phainon can often achieve this in a single Ultimate cycle. This eliminates the challenge of stacking a second Ultimate and prevents support teammates from being defeated during the process.
The extra turn acquired during his Ultimate allows Phainon to deal substantially more damage, and this extra turn does not consume action value. Whether paired with Characters like Kirel or Cyrene or not, an E2 Phainon, when supported by any ally who can help enable his setup, has a high probability of eliminating enemies within a single Ultimate cycle.
Top3: Castorice E2
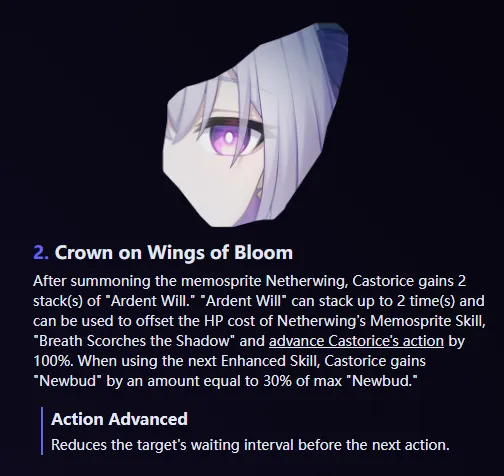
Castorice's Eidolon 2 can increase her damage by approximately 70-80% and may provide additional benefits when paired with her signature Light Cone (Memory Light Cone).
- Damage Increase: Eidolon 2 delivers a damage boost of around 70-80%.
- Light Cone Synergy: When equipped with Castorice's signature Memory Light Cone, new mechanics may unlock, offering further advantages.
- Alternative Options: Using other Memory Light Cones may fail to achieve the ideal synergistic effects, especially since new Memory Light Cones (such as the 5-star Herta Store Memory Light Cone) have not yet been introduced.
With 2 stacks of Ardent Will, Netherwing can unleash two additional breaths of "Breath Scorches the Shadow." Summoning Netherwing advances Castorice's action by 100%, enabling her to deal significant enhanced Skill damage. The guaranteed 30% Newbud gain ensures that Castorice only needs 70% to summon Netherwing, allowing for faster subsequent summons.
Top2: Cyrene E2
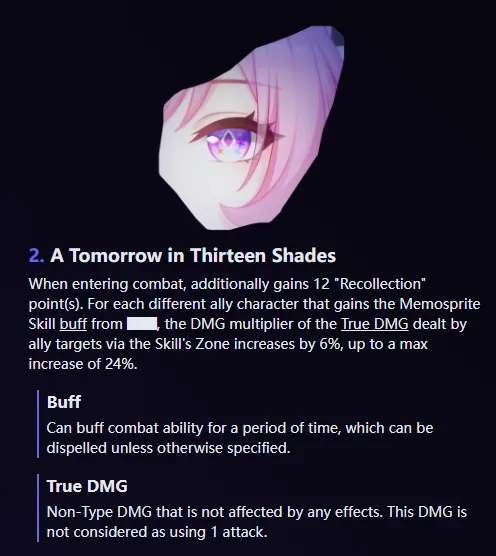
The primary issue with E0 Cyrene is her slow start-up. With E2, Cyrene gains an additional 12 Recollection points at the start of battle, significantly accelerating her initiation. The True Damage multiplier of her Skill's Zone is also increased, enhancing the team's overall damage output. E2 Cyrene provides a greater boost to non-Remembrance teams, while for Remembrance teams, Tribbie's E1 or Mydei's E1 is more recommended.
For players who enjoy building teams with Chrysos Heirs, pulling for E2 is highly advised. E2 fundamentally resolves the core weakness of Cyrene's slow start-up in non-Remembrance teams (such as those with Phainon), which often hinders team momentum. If you plan to use her as a versatile dedicated support for Chrysos Heirs, E2 is essential for improving both gameplay experience and performance.
Top1: Tribbie E1
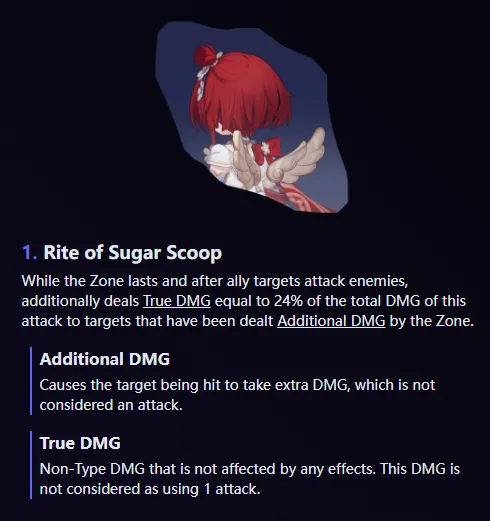
- The most valuable Eidolon in the Amphoreus due to its strong effect and low cost.
- While the Zone lasts and after alloy targets attack enemies, additionally deals True DMG equal 24% of the total DMG of this attack.
- This Eidolon is especially effective against bosses with the highest HP, especially in multi-enemy environment around AoE abilities.
- Since Amphoreus characters often deal multi-enemy damage, they synergize perfectly with Tribbie’s E1 bonus.
While True Damage skills have become more common, Tribbie's Eidolon 1 remains the strongest. This is because it not only deals True Damage, but also precisely targets the enemy with the highest current HP (usually the boss). Especially when combined with skills that excel at multi-target damage, such as Netherwing from Castorice or Mydei's Eidolon 1, it can inflict extremely high True Damage on the boss.
Conclusion
Signature Light Cones like Thus Burns the Dawn provide game-changing advantages for their respective characters, while carefully selected Eidolons significantly amplify their damage output, survivability, and team synergy. Understanding how to leverage these resources—not just individually, but in combination with team compositions and status effects—can greatly enhance your damage-over-time, area-of-effect, and support strategies.
In summary, limited-time characters can be played with E0S0 or E0S1, but these Light Cones and Eidolons are greatly improved. It is recommended to draw extra Eidolons. To fully unlock Light Cones and Eidolons, consider topping up Honkai: Star Rail through LDShop


 TOP UP WITH DISCOUNT NOW
Edmund G. Kolis Experienced Game Editor
Savannah Reed is a senior game editor at LDShop.gg, specializing in in-depth coverage of RPG and strategy games. With a strong focus on titles like Wuthering Waves, Honkai: Star Rail and Whiteout Survival, she combines industry insight with firsthand player experience to deliver clear, informative, and actionable content. Her work is dedicated to helping gamers make smarter decisions—whether it’s understanding new updates or optimizing their in-game strategy.
