


In HSR Currency Wars, some teams ask you to count tiles, track rotations, or micro every action bar shift. This one doesn’t. Once the engine is online, Argenti turns into a self-charging ult machine—you drop him on the Energy tile, hit Auto, and he basically pilots the entire run for you. No fiddling with actions, no timing puzzles, no stress; just effortless loops and a screen full of enemies disappearing.
In this guide, I’ll walk you through why this build works, how to assemble the bonds and gear it needs, and how to transition from a simple DoT / Belobog / Xianzhou opener into a fully automated A8–20 farming route. If you want a team that plays itself while you relax, this is the cleanest and comfiest option I’ve found.
Table of Contents
How This Infinite Energy Argenti Team Actually Works
In normal content, Argenti is already an AoE ultimate machine, but you still have to manage rotations by hand. In Currency Wars, his kit slots into the mode’s Energy ecosystem so well that he can become a semi-infinite auto-ult turret once the pieces are in place.
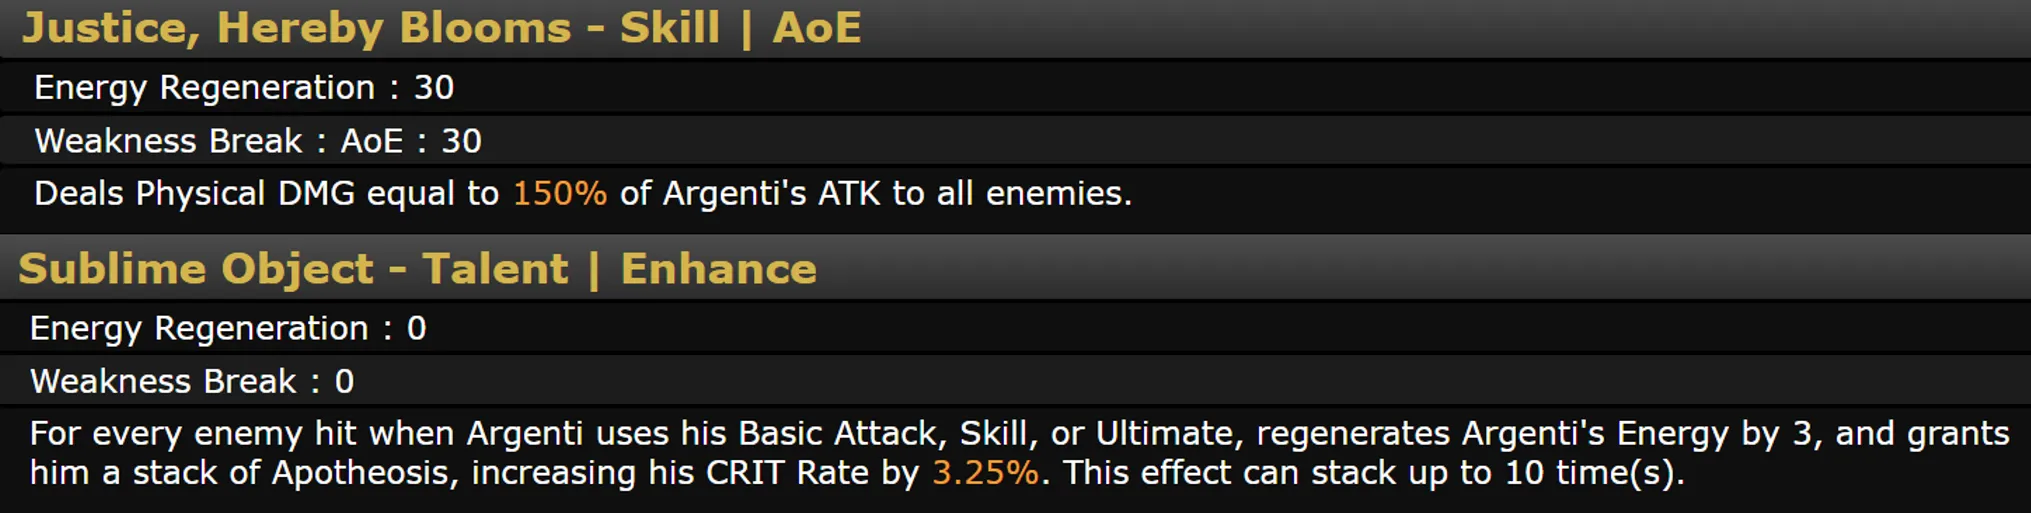
The whole idea leans on how Argenti’s kit handles Energy. His Skill naturally restores 30 Energy, and his Talent Sublime Object adds 3 Energy for every enemy hit by his Basic, Skill, or Ultimate while stacking Crit Rate. In big waves, a single Skill can easily hit multiple targets, so one cast can refund far more than the 30 base Energy on its own. Since his standard Ultimate only costs 90 Energy, the math is simple: if the total Energy he spends over several ults is lower than what a single Skill can refill, he can effectively loop Ultimates forever.
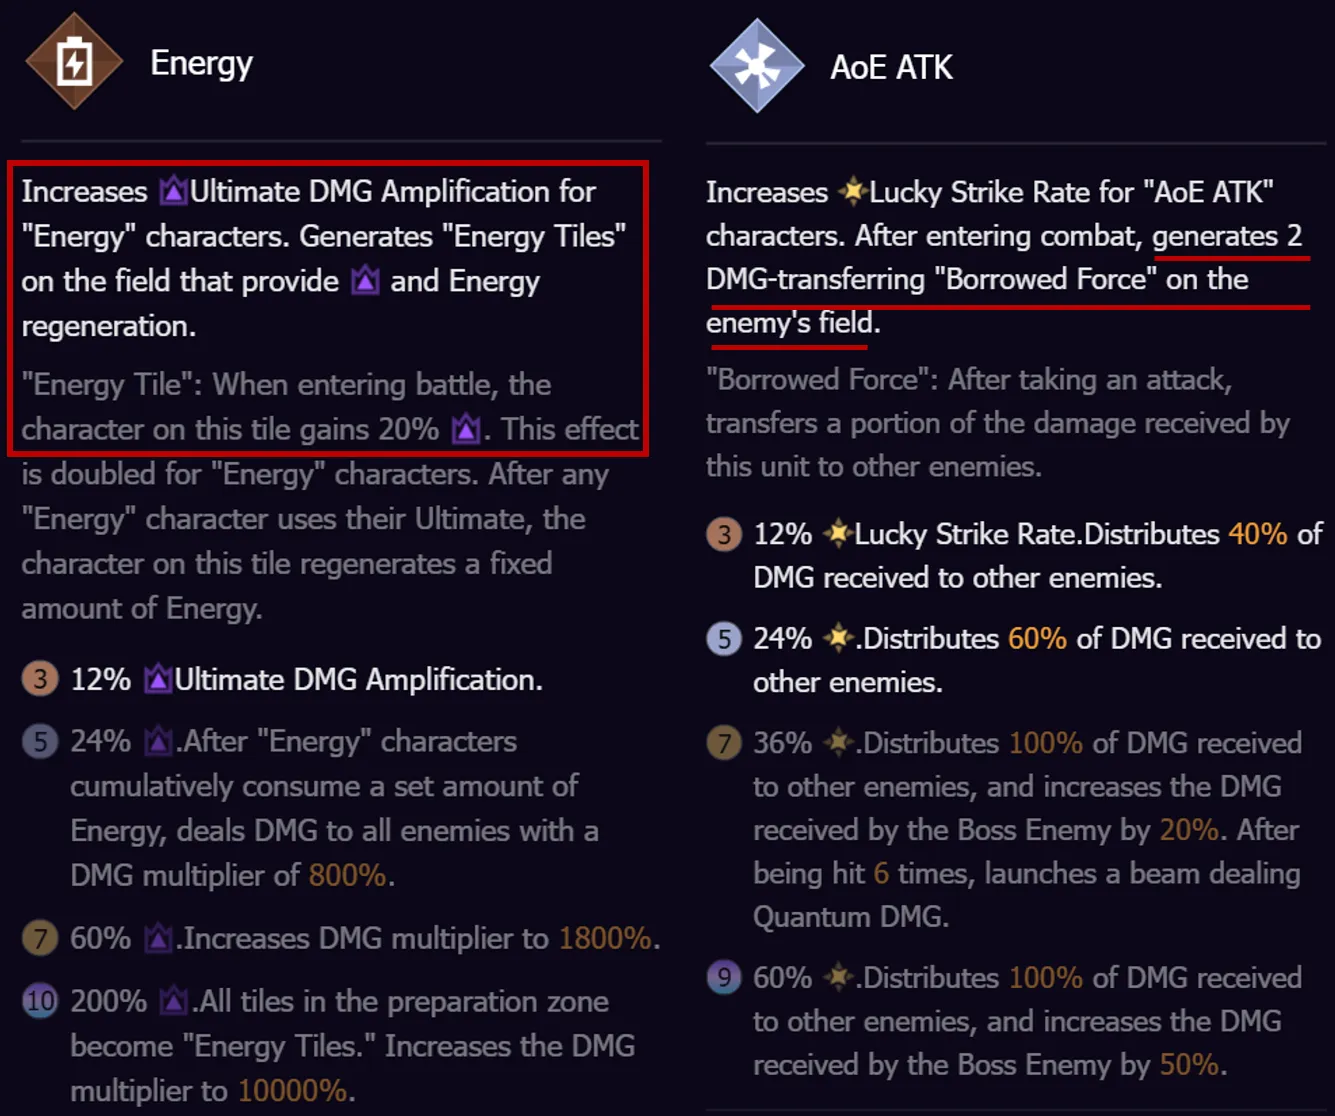
Currency Wars then layers three amplifiers on top. Energy bonds increase his Energy regeneration so each Skill and Talent proc gives even more back. AoE ATK bonds add extra targets, which directly boosts Sublime Object’s Energy refund. Finally, a key Currency Wars equipment piece, Caloric Overload, restores 10 Energy every time he uses his Ultimate, shaving even more off the effective cost. Once all of that is stacked together, each “Skill → Ult” cycle leaves him almost as full as before, which is how the “infinite ultimate” Energy Argenti loop becomes realistic in A8 runs.
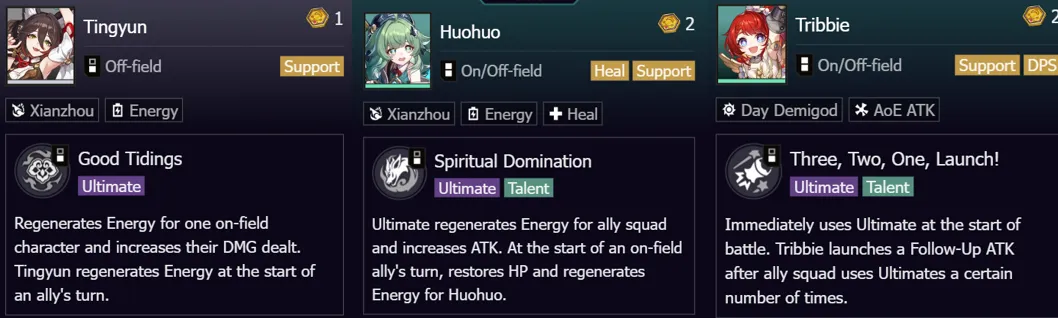
Around that engine you stack backline batteries—Huohuo, Tingyun and similar off-field generators who dump Energy into your on-field carry at the start of turns—plus a character like Tribbie, whose trace regenerates her Energy for every enemy hit by your team, letting her spam an action-advance Ultimate that keeps the turn order cycling in your favor.
When you layer all of this on top of Argenti’s own refunds, you end up in a state where he spends Energy to ult, instantly gets most of it back from Talent + tile + artifact + Light Cone + supports, and then does it again as soon as the game will allow. Once it’s online, it feels close enough that you can switch to Auto and watch him spin.
Infinite Energy Argenti Team Structure
|
On Field |
|||||
|
Argenti |
Trailblazer |
Sunday |
Tribbie |
||
|
Off Field |
|||||
|
Tingyun |
Huohuo |
Saber |
|||
|
Yunli |
Jade |
||||


The team concept is very simple: Argenti is the only thing that should be killing enemies; everyone else exists to feed him Energy and keep the engine stable. That means your on-field and off-field slots are built with completely different priorities.
On field, Argenti (with Energy Emblem) occupies the Energy Tile Positioning, because that’s the tile that turns his Ultimate into a self-refunding button.
Alongside him you typically bring Trailblazer and Sunday, who can patch awkward turns where the loop would otherwise stall by advancing him forward at key moments, and Tribbie, who carries an action-advance Light Cone (Dance! Dance! Dance!) serving Trailblazer and Sunday.
Off field, you assemble a classic Energy Bond Board. Huohuo and Tingyun are ideal because they provide Energy at the start of turns and when they ult, and they don’t need to hog the action order to do their job. You also want at least one extra AoE unit sitting in the back purely for bond tags and to add more hits when they do come in. The larger goal is to reach high Energy bond counts so that the entire board is tilted toward feeding Argenti’s ult bar.


Light Cone, and Relics Requirement
Argenti: Eagle of Twilight Line
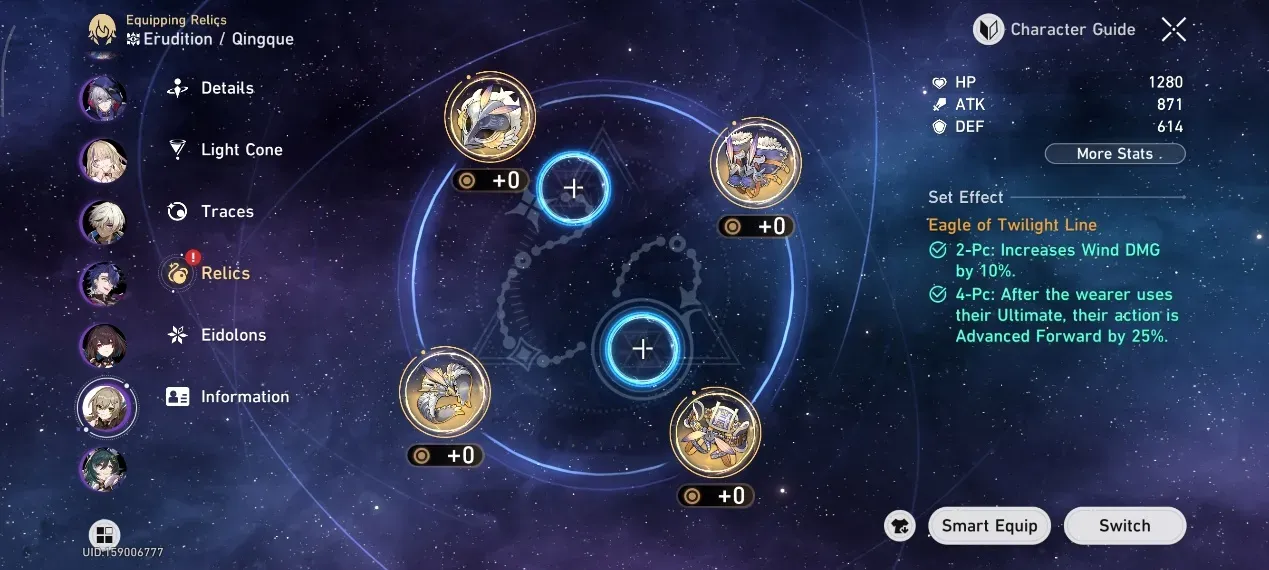
Eagle of Twilight Line advances the wearer’s action by 25% after every Ultimate, letting Argenti jump back up the action order and cycle Skill → Ult faster. The Wind DMG bonus is wasted, but the free action advance perfectly fits the “0 action value” gameplan.
Argenti: Passkey

Passkey is one of the budget cores of the loop: after using Skill, Argenti regenerates extra 12 Energy, on top of his base 30 Energy and Talent refunds. That huge Skill battery lets each rotation almost pay for the 90-cost Ultimate by itself.
Tribbie: Dance! Dance! Dance!
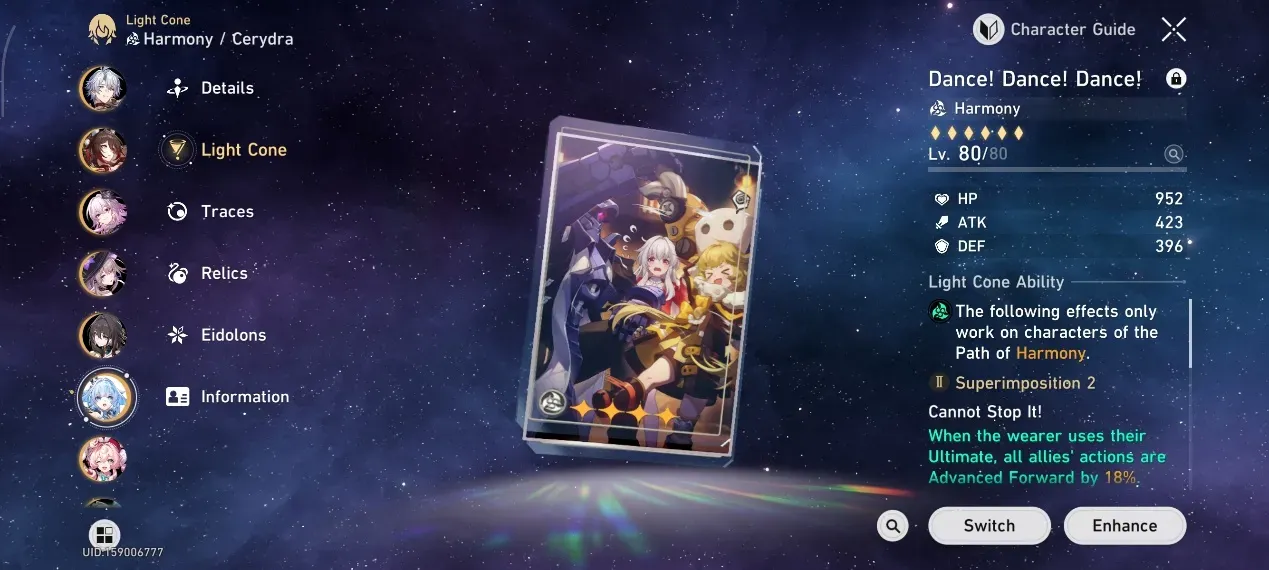
Pebble at Crossroads keeps Tribbie’s Energy topped off whenever Argenti hits multiple enemies, letting her ult constantly. With Dance! Dance! Dance! equipped, each ult advances the whole team—especially Trailblazer and Sunday, the two units that stabilize the turn cycle. This extra layer of action push acts as insurance for the loop, making the “hands-free” rotation far harder to break.
Best Investment Environment
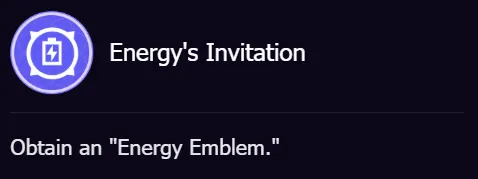
Energy’s Invitation is the best Environment because this team doesn’t function without high Energy bonds. Argenti’s “infinite ult” math assumes he’s equipped with Energy Emblem to boost regeneration. Grabbing a guaranteed Energy Emblem early lets you rush 5–7 Energy bond, turning every Skill + Talent proc into enough refund to sustain the loop.
Best Investment Strategy
|
Energy Emblem Set |
Energy Emblem |
Shining Blue Gem |
|
Obtains 1 "Energy Emblem," 1 "Sunday", and 1 "Victory Banner. " |
Obtains 1 "Energy Emblem" and 1 "Sunday." |
Obtains 1 "Blue Gem. "After 3 Node(s), obtains "Basic Weapon Box." |


All three picks are there for one reason: get Argenti an Energy Emblem as fast and as safely as possible so the infinite-ult math actually works.
- The full Energy Emblem Set rushes you straight toward a complete frontline and high Energy bond, so the loop comes online the earliest.
- The single Emblem route is the consistent backup when you still want to force Argenti.
- Shining Blue Gem is the last choice —you can still reach the same Argenti game plan a bit later.
Best Equipment Set
For this comp, the equipment plan is simple: rush Argenti’s core engine first—secure Energy Emblem and Caloric Overload on him as soon as possible, then fill the rest of the team’s gear flexibly around that.
|
Argenti |
Energy Emblem |
Caloric Overload |
Firestrom Surge |
|
Trailblazer |
Weapon Master |
Planetary Drill |
Victory Banner |
|
Tribbie |
Weapon Master |
Planetary Drill |
Victory Banner |


A Special Gift Just for You!
LDShop has a special deal for you—copy the exclusive code "LDSHOP5FF" and get a 5%OFF coupon for your next purchase! You can redeem the coupon by pasting the code in your Personal Center page, or redeem it directly at checkout. Please click the button below to top up now!


Discount code validity period: 2026.04.01 00:00:00 - 2026.07.31 23:59:59
Game Plan – Early, Mid, and Late
Early Game (Lv. 1–3)
|
Kafka |
Asta |
Sampo |


At the start this is not an Argenti run yet; I play a standard, low-risk board built around 3 DoT / 3 Belobog / 3 Xianzhou as my main transition shell. Any strong DPS that can slot into DoT / Belobog/ Xianzhou bonds is fine—the goal is simply to win every fight cleanly and keep the streak alive. I hover 50+ golds, only buying obvious power spikes, and rush level 6 as fast as my HP allows. Argenti can stay off the field for now; what matters is a safe winstreak and a healthy economy.
Mid Game (Lv. 4–6)
|
On Field |
|||
|
Argenti |
Tribbie |
||
|
Off Field |
|||
|
Tingyun |
Huohuo |
Jade |
Sparkle |

Once I hit Lv. 6, the real plan starts: I actively roll for Argenti and aim to push him to 3★ as early as possible. With a 3★ Argenti secured, I begin reshaping the board away from transition shell and toward the final shell. The first milestone is very clear: 3 Energy bond + 3 AoE bond with the core five of Argenti, Tribbie, Tingyun, Huohuo, and Jade on the roster.
As soon as those bonds are online and Argenti has his basic 2 gears, I move him to the Energy tile, start letting him take more on-field time, and gradually phase out the original carry while still keeping fights stable.
Late Game (Lv. 7–9)
From Lv. 7–9 onward, the gameplay is all about polishing the engine. The transition carry is gone; the frontline is now Argenti plus his full support shell, with saber, Trailblazer, Sunday and Yunli all in place. I keep buying and upgrading Energy units purely to push the Energy bond higher and higher, which directly boosts Argenti’s energy regeneration and damage.
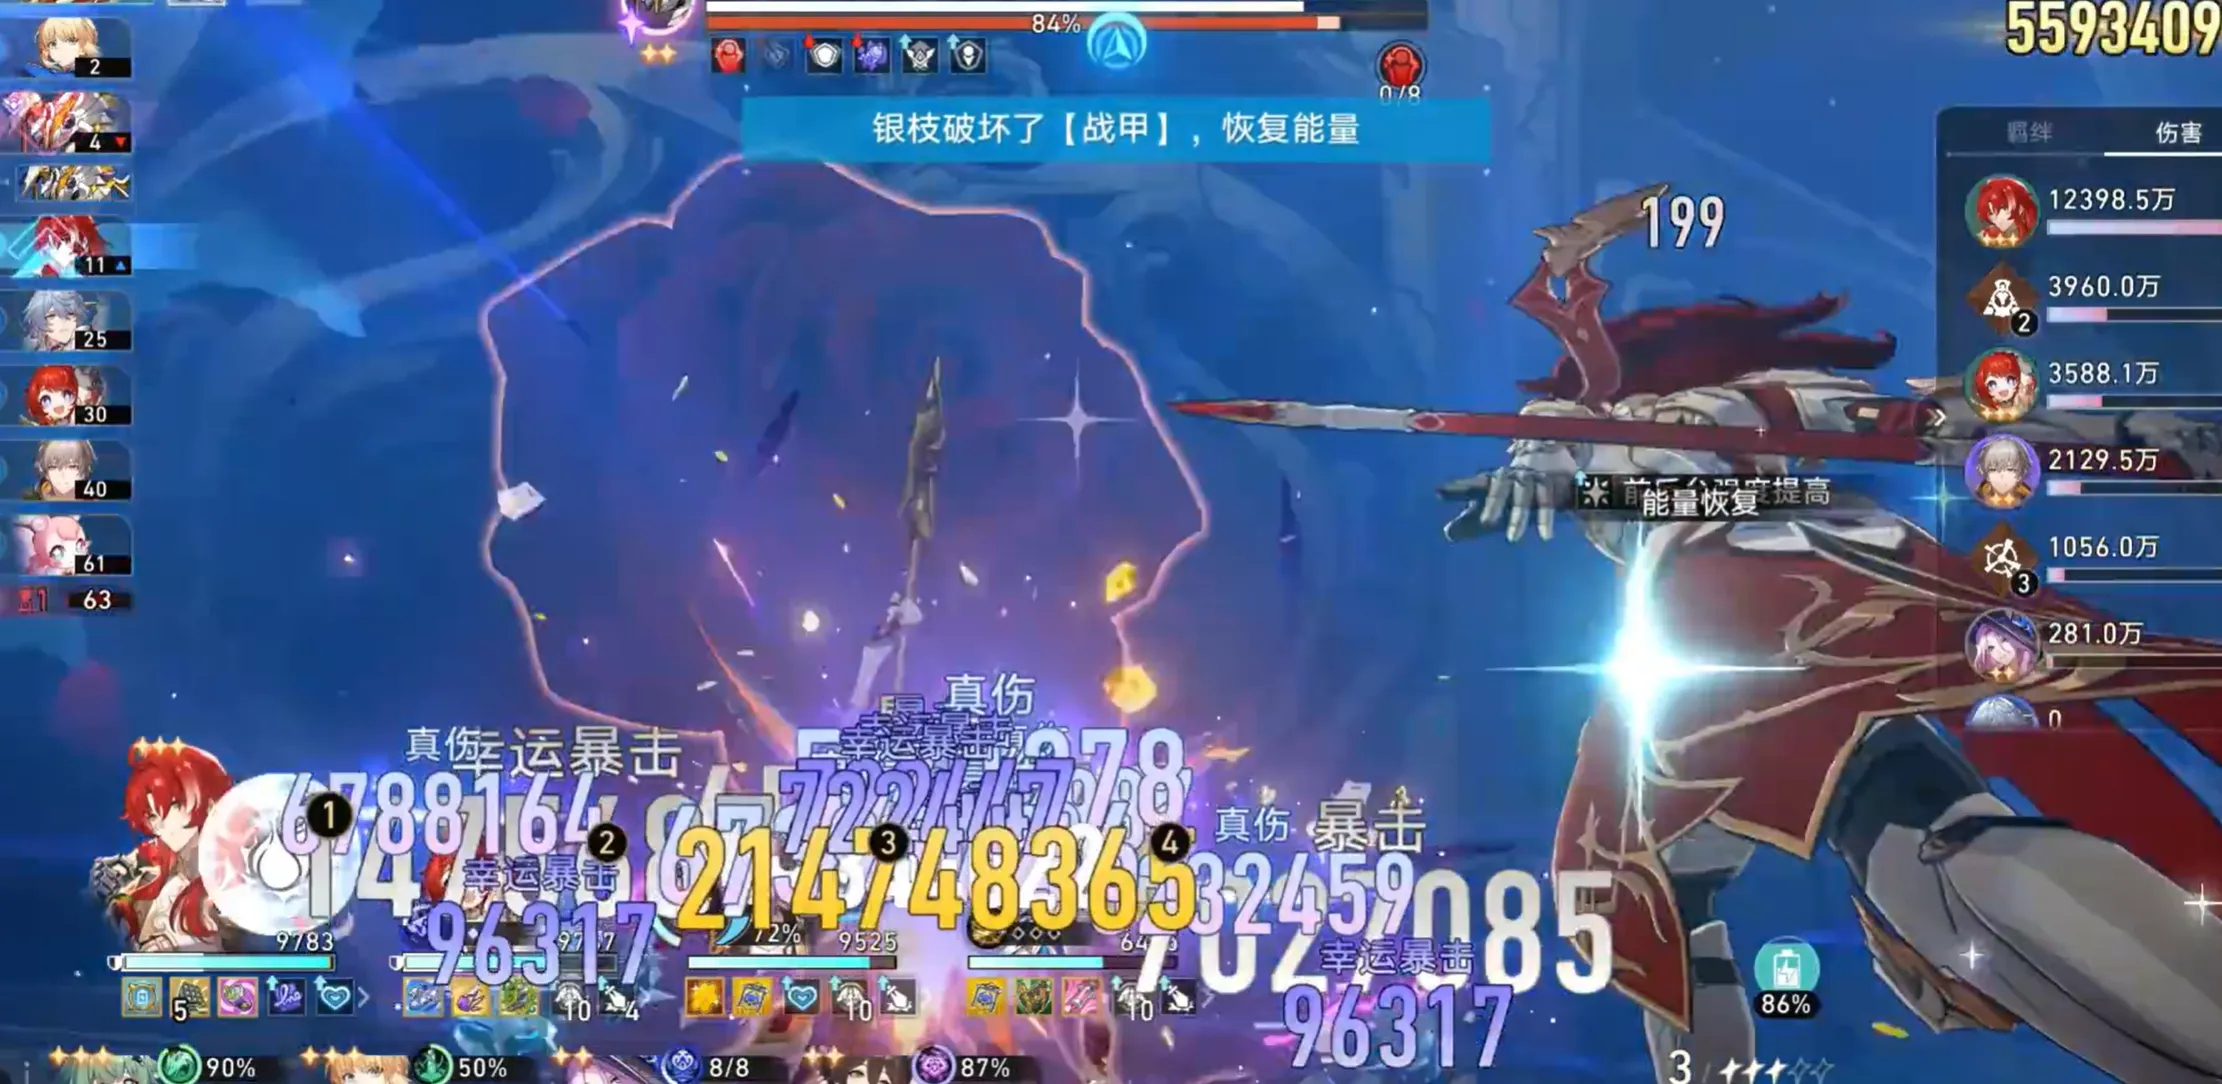
As the bond count climbs, his Skill → Ult cycle gets tighter until it effectively becomes an infinite ult loop on good nodes. At that point I can comfortably flip on Auto for A8-20: Argenti spins, supports battery, Energy bonds do the math, and the screen gets wiped with almost no input from me.
Conclusion
If you love the idea of your DPS living on the Energy tile forever, or just want a way to farm lower-pressure A8–20 runs while you do something else, this comp is absolutely worth trying—especially if you already own Argenti and his usual supports.
And if you’re just short on Argenti, Huohuo or Tribbie, you know the drill: topping up oneiric shard through LDShop, a safe, affordable channel, makes it much easier to finish the roster, lock in the engine, and let Argenti do the rest of the work for you.


 TOP UP HSR WITH DISCOUNT NOW
Henry Smith Experienced Game Editor
Greetings! I’m a veteran game editor and strategy guide creator with over a decade of experience exploring the worlds of action RPGs and gacha adventures. From the elemental battlegrounds of Genshin Impact, to the cosmic journeys of Honkai: Star Rail, and the fast-paced combat of Wuthering Waves, I dive deep into the mechanics, meta, and moments that define each game. What can you expect? In-depth guides, expert commentary, and practical insights to sharpen your gameplay and expand your understanding of the titles you love.
