


Artillery Brawlers are supposed to make the enemy miserable from a safe distance. You hide behind a wall, throw something over it, and suddenly the other team starts questioning every life decision that brought them into this match. Sounds easy. It usually is not.
This Brawl Stars Artillery Tier List ranks all artillery brawlers from S Tier to D Tier. The ranking focuses on how their current kits, range, area pressure, damage tools, and matchup value translate into this specific tier list.
Brawl Stars Artillery Tier List
| S | ||
| Nita | ||
| A | ||
| Pearl | R-T | 8-Bit |
| Eve | ||
| B | ||
| Lola | Clancy | Carl |
| Moe | Shelly | |
| C | ||
| Najia | Tara | Lumi |
| Surge | Mina | Spike |
| D | ||
| Rico | Colt | Chester |
| Colette |
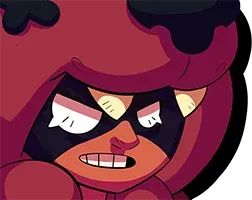







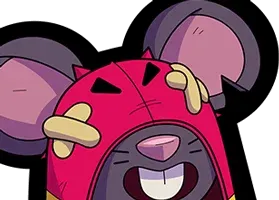

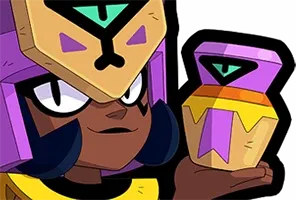

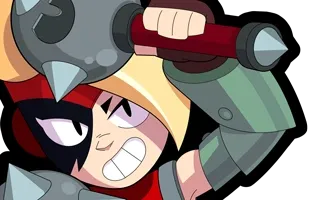






For the complete ranking across the entire roster, you can also check the Brawl Stars Tier List.
S Tier Artillery Brawlers
Nita

Nita takes the only S Tier spot because her kit can create pressure from multiple directions at once.
Her Bear gives her a persistent second threat on the battlefield, while her main attack provides reliable ranged damage. Her Hypercharge is especially important here. During Hypercharge, Nita's attacks gain increased speed, width, and range, giving her a much stronger long range pressure tool. The current meta discussion also specifically highlights Nita's Hypercharge as one of the strongest reasons to use her and points to Heist and Brawl Ball as particularly good modes.
That combination gives Nita much more than simple ranged damage. She can pressure an area, create another target for the enemy to deal with, and use Hypercharge to extend the threat of her main attack.
A Tier Artillery Brawlers
Bit

8-Bit's biggest advantage is raw ranged damage combined with his Damage Booster.
His main attack fires six projectiles with very long range, allowing him to punish enemies from a distance. His Super creates a turret that provides a 35% damage boost, giving both 8-Bit and nearby teammates significantly more offensive pressure.
The tradeoff is movement speed. 8-Bit is extremely slow, so positioning matters much more than it does for mobile Brawlers. Once he establishes a good firing position, however, his range and turret can make that area very difficult to contest.
Pearl

Pearl's strength comes from her Heat mechanic.
- Her attacks can build Heat, allowing her to convert stored Heat into stronger damage pressure. She also has the Heat Shield Star Power, which reduces incoming damage by 20% while her Heat is above 80%.
- Her Super adds another layer of area pressure. With her Hypercharge, Let Out Some Steam leaves a burning area behind for 4.5 seconds, giving Pearl additional control after using the Super.
Pearl is especially effective when enemies have to fight her at mid range. Her damage output gives her enough threat to punish opponents that try to walk into her space.
The supplied meta discussion also describes Pearl as highly versatile, with strong damage, high health, good range, and strong matchups into tanks and assassins.
R-T

R-T brings a very different type of ranged pressure.
- His main attack marks enemy Brawlers. When a marked enemy takes damage, the mark is consumed and deals additional damage. This means R-T can set up damage rather than relying entirely on one attack at a time.
- His Super lets him split into two parts. R-T's body and legs both gain short range attacks while he moves faster in the split form. He can later teleport back to his legs and heal for 1000 health.
That gives him both long range poke and a flexible close range mode. His marks can also be triggered instantly with the Hacks! Gadget, while Out of Line immediately charges his Super.
Eve

Eve's main attack fires eggs and gives her very long range, allowing her to maintain pressure without standing directly beside the objective. Her Super creates an egg that hatches into three Hatchlings.
That is important for an artillery style role because Eve can create additional threats after using her Super. The enemy cannot simply focus on Eve's main attack. They also have to deal with the spawned units.
Her very long attack range and additional Hatchling pressure give her strong control over space. However, her current meta performance is less dominant than the S Tier option, which is why she remains in A Tier rather than moving higher.
B Tier Artillery Brawlers
Clancy

Clancy's biggest strength is his Stage system. His main attack becomes stronger as he progresses through his stages. His Super also improves with his Stage level.
His Super fires a cone of paintballs, with later stages increasing its range and damage. His Hypercharge also makes the Super's paintballs pierce enemies before returning to Clancy.
The problem is that Clancy needs to build his Tokens and reach the stronger stages before his full potential appears.
That setup requirement keeps his power below the A Tier options, even though his Stage 3 kit can generate serious area pressure.
Carl

Carl's pickaxe gives him an unusual ranged attack pattern. Instead of using conventional ammunition, Carl throws his pickaxe and waits for it to return before being able to throw it again. The returning trajectory allows skilled players to use walls and positioning to create unexpected attack angles.
His Super changes the way he fights completely. Carl spins rapidly and deals damage while moving, allowing him to turn from a ranged pressure Brawler into a close range threat.
This gives him good flexibility, but it also means his strongest pressure is not purely long range. His effectiveness depends heavily on positioning and finding the right timing to use his Super.
Moe
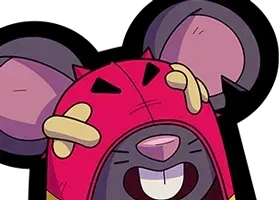
Moe's ranged pressure comes from his bouncing projectile.
- His main attack throws a rock that bounces once and breaks into a smaller rock. The rocks and the resulting stones can damage enemies and destroy obstacles.
- His Super lets him enter the Driller, travel underground to a target location, and deal damage while knocking enemies up when he arrives. He also gains a different attack while inside the Driller.
This gives Moe strong mobility and burst potential in addition to his ranged pressure.
However, that same kit makes him less specialized than the strongest artillery options. He is not simply sitting behind cover and controlling a lane. He can switch between ranged pressure and aggressive movement.
Shelly

Shelly is not a conventional artillery Brawler. Her strength is much more heavily concentrated around close range combat.
Her main attack fires a spread of shells, making her dangerous when enemies enter her effective range. Her Super is even more important for controlling space because it can knock enemies back while dealing heavy close range damage.
Her kit is excellent for punishing tanks and enemies that commit into her range. The problem is that this does not translate into the same long range pressure provided by the higher tier Brawlers.
The supplied meta discussion also places Shelly among the weaker current Brawlers and notes that tank counters have fallen because tanks are less dominant in the current environment.
That combination explains her B Tier placement here.
Lola

Lola's main strength comes from her Ego.
Her Super creates an Ego that can attack alongside her, allowing Lola to produce pressure from two positions. This makes her especially useful when she can position herself and the Ego so that enemies cannot comfortably contest both angles.
Her strength is also closely tied to damage output. The supplied meta discussion describes Lola as sitting somewhere between a Control Brawler and an anti tank option because of her high damage, even though she lacks the stun or knockback normally associated with dedicated anti tanks.
However, a recent bug fix reduced her overall effectiveness and pushed her down in the broader meta. Her Ego no longer produces the same level of damage pressure it previously did.
C Tier Artillery Brawlers
Tara

Tara's main attack fires three Tarot cards that pierce through enemies.
Her real control tool is her Super. Gravity pulls enemies together into one area, allowing Tara and her teammates to punish grouped opponents. Her Hypercharge increases the Super's area by 20%, making the pull cover more space.
The problem is that Tara's strongest control depends on charging and successfully landing her Super. Her basic attacks are also relatively slow to reload.
She has a powerful team fight mechanic, but she does not maintain constant long range pressure like the higher ranked choices.
Lumi
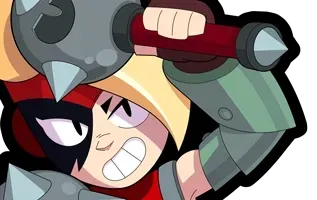
Lumi uses her Morning Stars as both a ranged damage tool and a control mechanic.
She can throw her stars and recall them, allowing the returning attack to deal additional damage. Her Super creates explosions, with the damage increasing with successive explosions.
Her Gadgets add more control. Grim and Frostbitten creates freezing winds around her Morning Stars, producing a slippery area. Her Half-Time Star Power slows enemies hit by the recalled Morning Stars.
Lumi therefore has legitimate control tools, but her effectiveness depends heavily on landing the Morning Star sequence and managing her positioning.
Surge
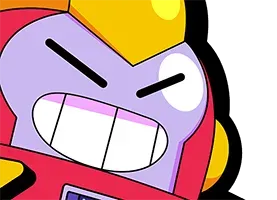
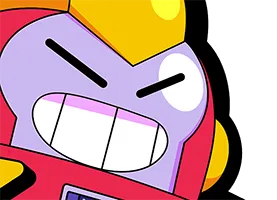
Surge's main attack splits when it hits an enemy, while his Super permanently upgrades him through up to three stages until he is defeated.
This scaling mechanic gives Surge a much higher ceiling once he has upgraded. His Power Shield Gadget can also convert part of incoming damage into two reloaded ammo, giving him additional resources during fights.
The problem is that Surge needs his upgrades to reach his strongest form, and losing him removes those upgrades.
His scaling is powerful, but less reliable as a pure long range pressure tool. That keeps him in C Tier.
Mina

Mina's kit revolves around repeated attacks and movement rather than traditional artillery zoning.
She has long attack range and fast movement, giving her the ability to reposition while maintaining pressure. Her third attack in the sequence is particularly important because it deals significantly more damage.
Mina still has useful range and mobility, but the current version does not provide enough consistent control to justify a higher placement.
Najia
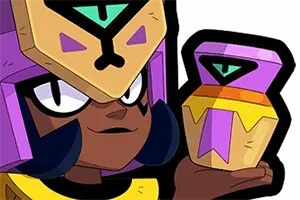
Najia has very long range and a very fast reload speed, allowing her to maintain pressure from a distance. Her Super also creates additional snakes, giving her a way to establish extra pressure on the battlefield rather than relying entirely on her basic attack.
However, Najia has received several important nerfs. Those reductions directly affect how often she can create additional pressure and how difficult that pressure is to remove.
Spike

Spike's main attack fires a cactus projectile that splits into multiple spikes, allowing him to cover more space after the initial projectile reaches its target.
His Super creates a damaging area that also slows enemies, making it useful for controlling objectives and restricting movement.
The supplied meta discussion specifically describes Spike as a strong control and lane control Brawler but notes that he has fallen because the current meta is less favorable to control Brawlers and more focused on strong anti tank options.
Spike still has excellent area denial. He simply does not have the same meta impact that his kit has had in stronger periods.
That places him in C Tier.
D Tier Artillery Brawlers
Rico

His main attack fires bullets that bounce off walls and gain additional range, allowing him to hit enemies hiding behind cover. His Super works in the same general way while firing a longer burst that can pierce enemies and bounce off walls.
This can be extremely powerful on wall heavy maps. The problem is that the value of his kit changes dramatically depending on the environment.
Rico also has relatively low health, so getting caught in the open or approached by an aggressive enemy can quickly become a problem.
In this particular ranking, that dependence on favorable terrain keeps him in D Tier despite the strength of his wall bounce mechanic.
Chester

Chester's main weakness is consistency.
His attacks and Super revolve around different effects, giving him strong potential when the right sequence lines up. That versatility can make him dangerous, but it also makes his output less predictable than the more specialized artillery options.
More importantly, Chester has recently been hit by several nerfs. The supplied meta discussion also directly attributes part of Chester's decline to those recent nerfs.
Colt

- Colt has very long ranged basic attacks and can fire multiple bullets in a straight line.
- His Super is one of his biggest strengths because it fires a long stream of bullets that can destroy obstacles. This lets Colt open the map and remove cover that other Brawlers rely on.
The problem is that his effectiveness is highly dependent on hitting multiple bullets and having enough space to exploit his range. That mode dependence makes D Tier reasonable here.
Colette

Colette's main attack deals damage based on the enemy's current health, with a minimum damage value. Against special targets such as the Heist Safe, she has a separate damage value. Her Super also deals damage based on maximum health.
That makes her particularly effective against high health targets and explains why she remains useful in Heist.
She also has the Push It Star Power, which carries enemies toward the end of her Super and can briefly stun them at maximum distance. Her Mass Tax Star Power provides 60% damage reduction during her Super and a shield when she hits a Brawler.
However, her current overall performance has fallen sharply. Recent changes reduced the charm duration of Na-Ah! from 1 second to 0.5 seconds, and the supplied meta discussion also notes nerfs to her attack and health. She is now mainly recommended for Heist, where her damage remains valuable.
So while Colette still has strong anti tank and objective damage tools, her overall consistency is not enough for a higher tier.
Final Thoughts
The biggest lesson is that long range damage alone does not automatically make a Brawler a great artillery pick. Range, area denial, reload efficiency, positioning tools, mobility, and the ability to keep enemies away from objectives all matter. Sometimes your “perfect long range pick” survives exactly three seconds after an assassin jumps on it. Classic Brawl Stars.
If you need more resources before your next match, you can also check out Brawl Stars top up options through LDShop. A stocked account will not fix questionable positioning, missed Supers, or the teammate who walks directly into three enemies. But at least you will have the resources ready when you decide it is time to lock in your next main.
More Tier List
Brawl Stars Controller Tier List
Brawl Stars Marksman Tier List
Brawl Stars Assassin Tier List






 TOP UP WITH DISCOUNT NOW
Rich Experienced Game Editor
Rich is a passionate gamer and strategy explorer who loves uncovering hidden mechanics, experimenting with team comps, and sharing tips that actually help players succeed. She has a talent for breaking down complex systems into easy-to-understand guides, making even the trickiest battles feel manageable. When she's not diving into virtual worlds, you might find her debating game lore, hunting for easter eggs, or enjoying a snack while plotting her next in-game strategy. Rich's goal? Helping fellow gamers have more fun while leveling up their skills.
