


Greetings, Travelers!
Ineffa is a 5-star Electro Polearm user in Genshin Impact that functions as a Lunar-Charged Sub-DPS! With her mystical powers, she has redefined the potential of elemental combat through the Lunar-charged Reaction. While this reaction is often seen as an enhanced version of the classic Electro-Charged reaction, it differs fundamentally in its internal mechanics and scaling.
Under this unique reaction system, who are the best teammates to join Ineffa in composing a symphony of Lunar-charged strikes? Furthermore, which veteran characters have found a new lease on life in this electrifying playstyle? Let’s dive in and take a closer look at how Lunar-Charged is reshaping team building.
Welkin Moon for Just $ 1.00
Limited daily random drop 🎁 from LDShop
First come, first served!

New User Discount! Blessing of the Welkin Moon
Limited-time offer: $ 1.00 | $ 4.99
LDShop's new users can claim $ 1.00 Blessing of the Welkin Moon while supplies last. First come, first served, so grab yours now.
Missed it? No worries. You can still claim a new-user 15% OFF coupon instead.
Table of Contents
Ineffa Profile
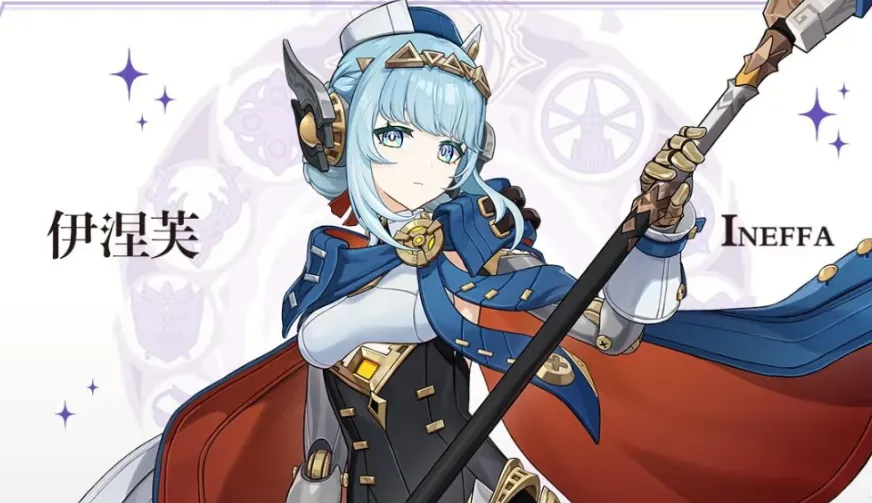
Reality: ★★★★★ Element: Electro Weapon: Polearm Faction: Nod-Krai
Role: Off-field Electro Shielder • Lunar-Charged Reaction Core • Elemental Mastery Buffer
Seamlessly integrates off-field Electro DMG, shielding, and team-wide EM buffs into one rotation, elevating Electro-Charged teams into the "Lunar-Charged System" system.
- C0: Complete core mechanics.
- C2: Balances offense and defense.
- C6: Electro Reaction powerhouse.
Combat Mechanics
Normal Attack: 4-stage spear strikes → Charged Attack: 360° spin → Plunging AoE DMG.
Elemental Skill:
- Instantly deals AoE Electro DMG.
- Summons a " Optical Flow Shield Barrier" (DMG Absorption = ATK × scaling; 250% Absorption vs. Electro DMG).
- Deploys the smart unit "Birgitta" for continuous off-field coordinated attacks.
Elemental Burst: Birgitta launches a rocket-powered fist strike, dealing massive AoE Electro DMG. If Birgitta already exists, resets its position and duration for seamless high-frequency Electro DMG.
Core Talents:
- Moonsign Benediction: Assemblage Hub: Upgrades standard Electro-Charged to Lunar-Charged Reaction; Gains +0.7% Base DMG per 100 ATK (max: 14%).
- Panoramic Permutation Protocol: After casting Burst, grants Parameter Permutation effect to all party members: ↑ Elemental Mastery by 6% of Ineffa’s ATK (20s duration).
- Overclocking Circuit: When an thundercloud exists near Birgitta, deals additional Electro DMG equal to 65% of Ineffa’s ATK (considered Lunar-Charged Reaction DMG).
I want to know more about Ineffa's kit !
6480+1600 Genesis Crystals for Just $ 67.99

Limited-time offer: $ 67.99 | $ 99.99
No more price checking. LDShop always offers the best price.
Hydro Character
Columbina
Columbina’s kit is tailor-made for Lunar reactions, and when paired with Ineffa, she becomes one of the most stable and high-ceiling Lunar-Charged enablers in the game. Her sustained Hydro application, reaction amplification, and Gravity-based follow-up damage all scale exceptionally well in continuous Electro-Hydro environments.
At the core of this setup is Gravity Ripple, Columbina’s defining mechanic. As it follows the active character and continuously deals AoE Hydro DMG, every Lunar-Charged trigger generated by Ineffa and the Electro supports feeds Gravity accumulation. Once the threshold is reached, Columbina unleashes powerful follow-up damage based on the dominant Lunar reaction, making Lunar-Charged rotations especially rewarding.
Team Compositions:
Columbina + Ineffa + Flins + Sucrose / Fischl
Columbina + Ineffa + Fischl + Sucrose
|
Columbina’s Teams |
|||
|
|
|
|
|
|
|
|
|
|
|
|
|
|
|


Tartaglia
The revolutionary Lunar-Charged Reaction reaction synergizes exclusively with Hydro/Electro DPS/sub-DPS units, Elemental Mastery supports, and RES-shredding allies. Its first and greatest beneficiary is none other than the original "National Treasure" driver himself: Tartaglia.
Team Composition: Tartaglia + Ineffa + Sucrose + Fischl/Yae Miko/Ororon
This lineup evolves Tartaglia’s classic "National Treasure" team by integrating Ineffa’s triple-role prowess as a shielder, sub-DPS, and survival unit—replacing Beidou entirely.
With Ineffa’s barrier neutralizing interruption risks and her smart unit Birgitta enabling relentless Lunar-Charged Reaction triggers, Tartaglia’s Riptide bursts chain-react across grouped foes, while Sucrose’s EM buffs/VV shred and Fischl/Yae’s off-field Electro amplify the reaction’s multiplicative damage.
The result? Unrivaled AoE decimation that transforms chaotic mob battles into a symphony of Hydro-Electro annihilation.
|
Tartaglia's Teams |
|||
|
|
|
|
|
|
|
|
|
|
|
|
|
|
|


Key Enhancements:
- Rationale for Beidou Replacement: Ineffa’s shield (250% Electro DMG Absorption) resolves Tartaglia’s survivability weakness, while her smart unit Birgitta achieves 120% coordinated attack uptime—surpassing Beidou’s Burst in both Electro application frequency and AoE coverage.
- Damage Transformation Breakpoint: When Tartaglia’s Riptide Blast triggers Lunar-Charged Reaction, it unleashes an additional "Moonlight Splash" (AoE Electro DMG scaling with 80% of Ineffa’s ATK), igniting a Chain Reaction.
- Maximized Elemental Mastery Synergy: Sucrose’s passive "Catalyst Conversion" grants the team 250 EM, compounded by Ineffa’s Burst "Parameter Rebuild" (converting ATK to EM). Together, they amplify Lunar-Charged Reaction’s base DMG by over 60%.
- Tactical Evolution: The team dominating traditional compositions in AoE efficiency.
Kamisato Ayato
Renowned across Teyvat as a "Universal Elemental Catalyst," Kamisato Ayato seamlessly integrates with every new combat system—from direct-DPS teams like "Ayato-Yun Jin-Bennett-Kazuha" to Dendro-reactive Burgeon/Hyperbloom squads and triple-Hydro "Ayato-Yelan-Furina" resonance. Now, he ascends as the premier conductor of Lunar-Charged Reaction!
Team Composition: Ayato + Ineffa + Sucrose + Yelan/Xingqiu
|
Kamisato Ayato's Teams |
|||
|
|
|
|
|
|
|
|
|
|


Core Tactical Logic:
- Double Hydro Resonance (Yelan/Xingqiu) eliminates Ayato’s Energy Recharge constraints. Even without his Burst, Hisenkou slashes + Yelan’s Lingering Lifeline or Xingqiu’s Rain Swords achieve permanent Hydro-Electro application, ensuring Birgitta’s every coordinated strike triggers Lunar-Charged Reaction;
- Sucrose delivers crowd control, 40% RES shred (4pc Viridescent Venerer), and +250 Teamwide EM—propagating Lunar-Charged Reaction’s AoE damage exponentially;
- Dominates grouped enemies as chain reactions engulf entire battlefields.
Advanced Team: Ayato + Ineffa + Furina + Xilonen
|
Kamisato Ayato's Teams |
|||
|
|
|
|
|


- Furina provides teamwide DMG buffs and off-field Hydro application, perfectly syncing with Ayato’s quickswap rhythm;
- Xinolene shreds All-Element RES, amplifying mixed-reaction damage;
- Ineffa’s shielding ensures Ayato’s on-field safety, while her ATK-to-EM conversion maximizes reaction yields—a definitive AoE solution.
Sangonomiya Kokomi
Team Composition: Sangonomiya Kokomi + Ineffa + Sucrose + Fischl/Yae Miko
|
Sangonomiya Kokomi's Teams |
|||
|
|
|
|
|
|
|
|
|
|

Tactical Framework Analysis
|
Character |
Core Role |
System Contribution |
|
Kokomi |
On-field Enabler & Healer |
Bake-Kurage (E) lasts 24s → AoE healing + persistent 1A Hydro application (100% trigger rate) |
|
Ineffa |
Shielder & Electro DMG Engine |
Luminous Barrier blocks interruption; Birgitta coordinates attacks (Electro hit every 1.5s) |
|
Sucrose |
EM Buffer & RES Shredder |
VV 40% Hydro/Electro RES Shred + +250 Teamwide EM → ↑Moonlight Overload DMG by 60%+ |
|
Fischl/Yae Miko |
Off-field Electro Reinforcer |
Oz/Sesshou Sakura fill Kokomi’s Hydro gaps (*Bake-Kurage applies Hydro per 2s; dual Electro ensures 100% Electro uptime*) |
Electro Character
Cyno
As the cornerstone of extended Quicken/Aggravate teams, Cyno currently anchors the "Cyno-Furina-Baizhu" core (+ Fischl/Beidou/Kuki). Ineffa’s arrival redefines extended Electro rotations—delivering a triple-solution role (Shield + Teamwide EM Buff + Electro Resonance Energy) that resolves Cyno’s three critical weaknesses:
- Survival Pressure → Luminous Barrier (250% Electro DMG Absorption) negates damage risks during Pactsworn Pathclearer
- Interruption Vulnerability → Shield grants stagger resistance, ensuring seamless QTE chaining
- Energy Gap → Resonant Thunder + Ineffa’s E particle generation (4 particles/15s) → lowers Cyno’s ER requirement from 140% → 110%
Team Composition: Cyno + Furina + Baizhu + Ineffa
|
Cyno's Teams |
|||
|
|
|
|
|


Conclusion
👉Build Ineffa to best with our comprehensive Ineffa build guide! 🤖
Don't see Ineffa merely as an "Electro Shielder"—she is HoYoverse’s carefully planted "Key to Nod-Krai." The Lunar-Charged Reaction system is but the first piece of her grand design: mechanisms like independent multipliers, exclusive stacking, and EM-to-DMG conversion clearly leave intentional openings for expansion. Upcoming characters will likely complete this framework!
Pulling her now isn’t just for current power—it’s a preemptive investment in Nod-Krai’s future dominance.
"The strongest meta comps are always built piece by piece—and this Key unlocks tomorrow’s throne."
—Grab your Primogems. The age of Nod-Krai dawns.


 TOP UP WITH DISCOUNT NOW
 ☛ About LDShop

LDShop.gg is your go-to global platform for game top-ups, in-game currency, CD keys, and game items. With years of experience serving players around the world, we’re known for fast delivery, competitive pricing, and exceptional reliability. Whether you're gaming in Europe, the Americas, Asia, Southeast Asia, or beyond—LDShop ensures a smooth and secure experience every time.
👉Why Gamers Trust LDShop
- Safe & Secure Transactions
Every transaction on LDShop is protected by advanced encryption and strict data privacy measures. From start to finish, your account and payment information stay secure. We’re committed to 100% safe delivery—no shortcuts, no risks. - 24/7 Customer Support You Can Count On
Got a question or issue? Our professional support team is available around the clock—before, during, and after your purchase. Whether it’s live chat, email, or other support channels, we respond fast so you can get back to gaming. - 100% Refund Guarantee
At LDShop, your satisfaction is our top priority. If your purchase isn’t delivered or can’t be used, we’ll refund you—no hassle, no hidden terms. It’s part of our promise to provide both great value and complete peace of mind.
