


For Trailblazers ready to push their limits, the newly updated trial stage "Dissonance” is now live in HSR 3.8! This challenging Anomaly Arbitration mode continues to evolve with fresh updates and intense battles — are you brave enough to take it on?
This blog introduce you Unlock Conditions, Stages Analysis, Team Comps, Rewards an so on. Are you ready? Let’s go!


Table of Contents
Unlock Conditions
Once Trailblazers have achieved full-star records in Stage 12 of Memory of Chaos, Stage 4 of Pure Fiction, and Apocalyptic Shadow at Difficulty 4 (these can be completed in different versions), the new challenge mode will be unlocked. Prepare for a showdown against formidable foes.
Stages Consists
"Anomaly Arbitration" consists of three trial stages and one final stage.
Trailblazers must form three separate teams to take on the trial stages. After completing them, Trailblazers will be able to assemble any characters into a team to challenge the even more challenging final stage.
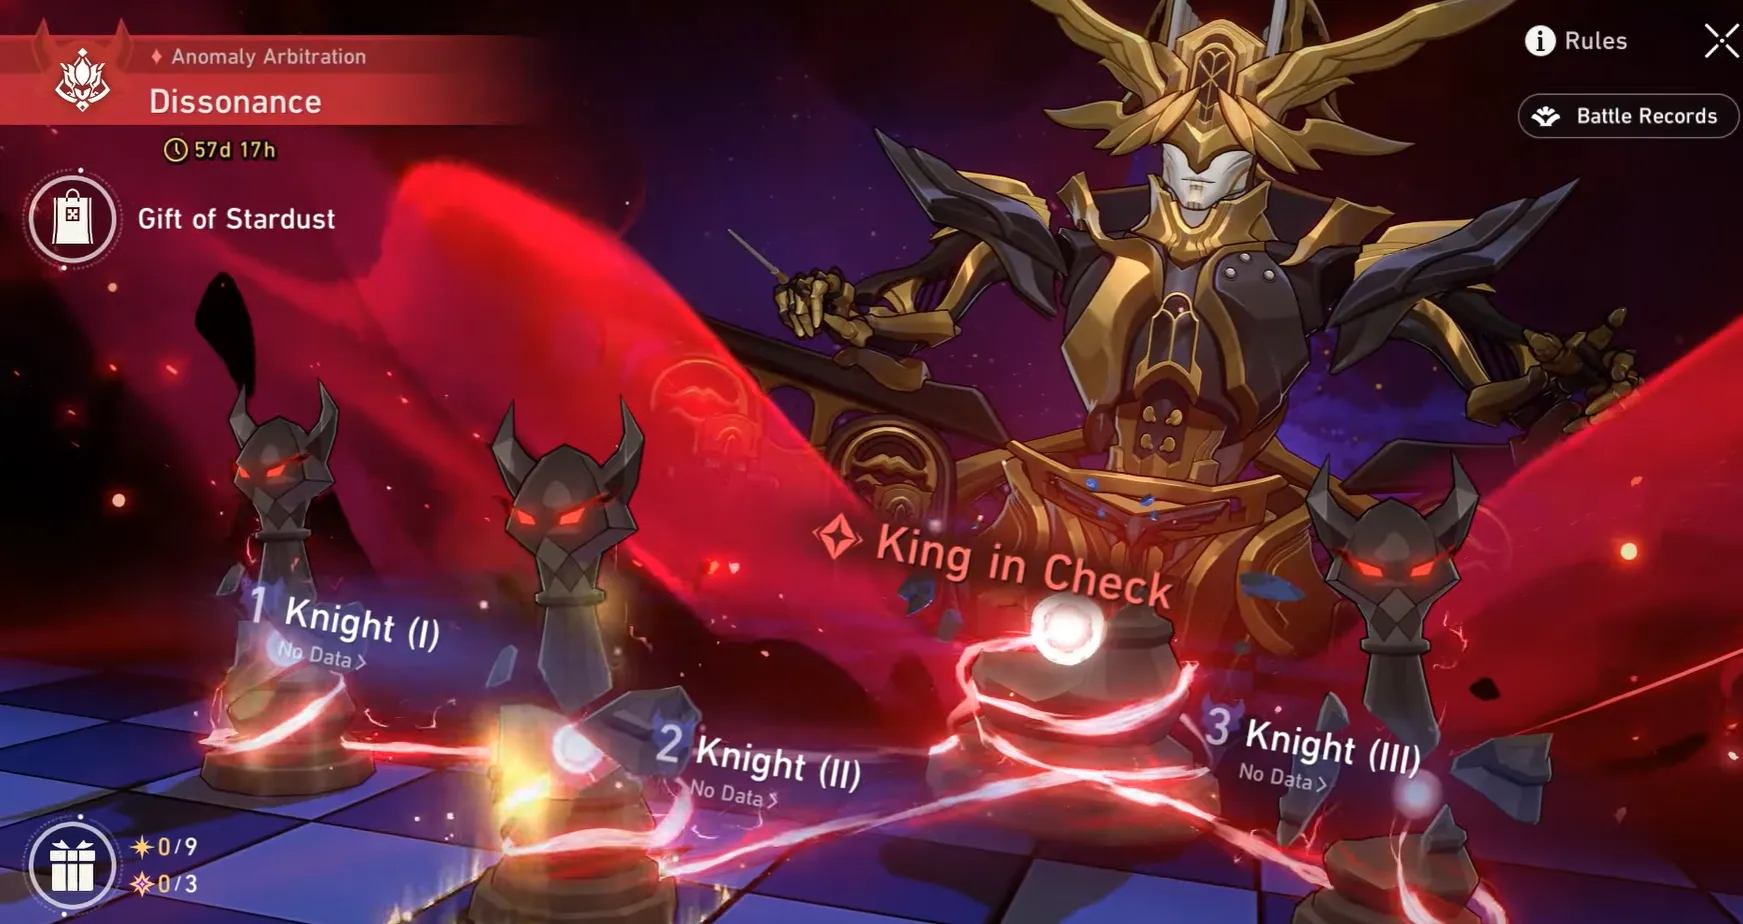
Star Requirement
Knight Cycles: 6
- Achieve victory in no more than 4 Cycles
- Achieve victory in no more than 2 Cycles
- Have no downed characters
Gameplay Analysis
Ultimate Goal
Clear the "King in Check" stage with at least 1 star to obtain a new item called the "Interference Key." This item allows you to lock one substat when relic crafting.
- Note: Achieving 2 or 3 stars only grants different profile avatars and more tokens for the new exchange shop. These are more like cosmetic rewards, so don't feel pressured to get them.
Before the "King in Check" stage, there are 3 "Knight" stages. Clearing these "Knight" stages significantly reduces the challenge difficulty of the "King in Check" stage, lowering the required team investment from around E6 level down to E0 or E2 level.
You need to form 3 separate teams for the 3 "Knight" stages, as characters cannot be reused across them. You only need to clear these stages to activate the reduced difficulty for the "King in Check" stage. Then you can challenge the easier version with freely assembled teams.
※ If you have a high demand for "Self-Modeling Resin," you can aim for higher star ratings in the "Knight" stages. Reaching 3/6/9 total stars will reward you with 1 "Self-Modeling Resin" each.
Budget-friendly HSR Top-up helps you complete this challenge efficiently!
Normal Stages Team Comps Recommendations
Knight I
Inversion: Each time after the enemy target is attacked, the attacker will lose HP equal to 2% of their own Max HP. This effect is Non-fatal.
|
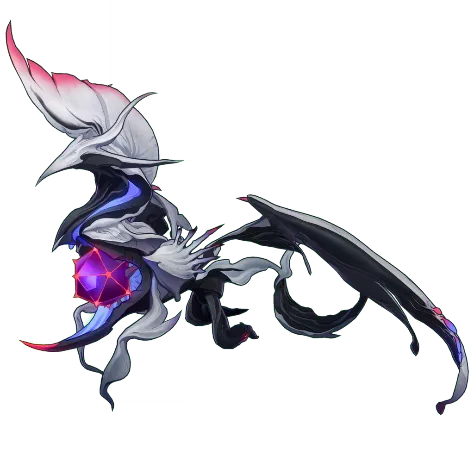
Cyclonic Swarm Mother x 2 |
The Ascended x 2 |
|
|
|

Analysis
Knight I is pure attrition: Inversion shaves 2% of the attacker’s Max HP on every hit (non-fatal), so fast multi-hit or follow-up patterns quietly bleed themselves over time. The enemies are also extremely tanky, so if you don’t control tempo the fight naturally drags. You face two identical waves: Cyclonic Swarm Mother + The Ascended. Cyclonic is the main time sink—its incubation cycle can spawn Mirage Fizzle Kids, and while those adds are up it can keep piling on repeated AoE pressure until you clear them. The Ascended layers extra punishment with a charge into Prana effects that can apply Prana-Siphon (cutting max recoverable HP by around 30%) plus Wind Shear. Together, it’s common to stabilize “alive at 20%,” then get finished by AoE or DoT.
Strategy
A clean default approach is to prioritize Cyclonic Swarm Mother in each wave, then finish off The Ascended. Cyclonic is the run’s tempo anchor: it drains time by repeatedly creating add waves, and the longer you let the fight stretch, the more you “pay” the Inversion HP tax while getting dragged into extra summon cycles. The moment Mirage Fizzle Kids appear, delete them fast—otherwise the boss can keep rolling out AoE pressure until the summons are cleared, and your team’s HP bar will spiral down even if your raw sustain looks fine.
At the same time, watch The Ascended’s charge/setup like a countdown. If it starts powering up, either break/delay it or push damage so you don’t eat a full-party Prana-Siphon at the worst possible timing (when your HP is already shaved by Inversion). If Prana-Siphon still lands, cleanse it quickly and expect your recovery to feel noticeably restricted. Your biggest damage window is Cyclonic’s incubation phase—your hits convert into extra chip progress and the summons are easier to wipe—so stack shields/regen/cleanse before you commit to a high-hit burst sequence, because Inversion will pull you into lethal range even though it can’t directly finish you off.
Team Recommendation
|
Team 1 |
|||
|
|
|
Trailblazer (Remembrance) |
|
|
Team 2 |
|||
|
Phainon |
Cyrene |
|
Trailblazer (Remembrance) |
|
Team 3 |
|||
|
Mydei
|
Cyrene (E0S1) |
Trailblazer (Remembrance) |
Hyacine |
|
Team 4 |
|||
|
(E0S1) |
Anaxa |
Tribbie |
|
















Knight II
Tempering: For every 1% HP the enemy target loses, reduces CRIT DMG dealt to them by 3%.
|
Wave 1 |
|
|
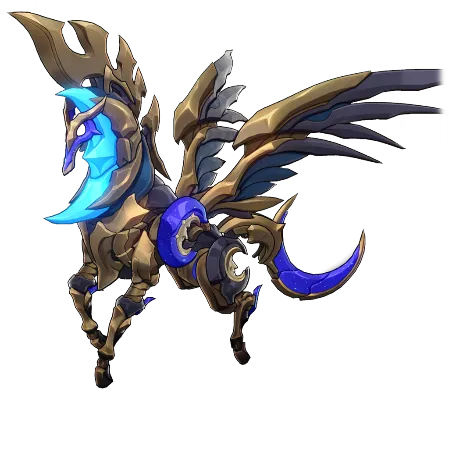
Noontide Gryphon |
Moonlit Pegasus |
|
Wave 2 |
|
|
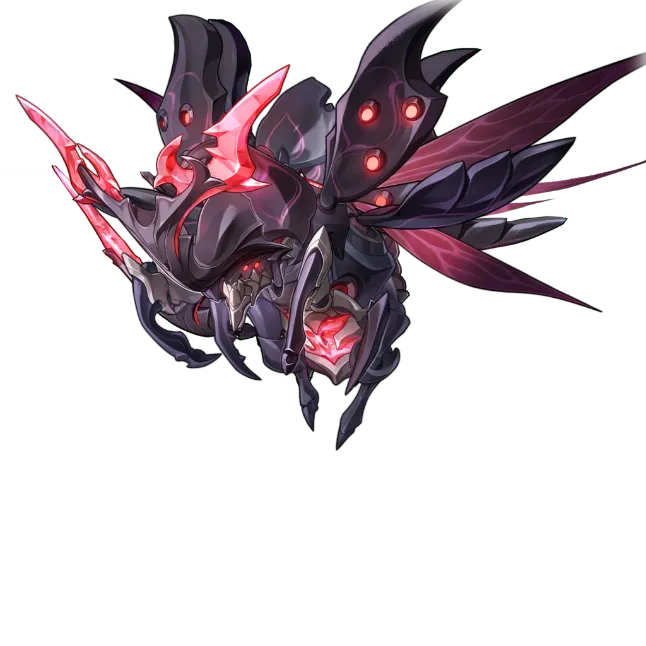
Swarm: True Sting |
|

Analysis
Knight II is built around Tempering, which makes your CRIT damage fall off harder and harder as enemies lose HP, so “pure crit burst” teams often feel great at the opener and then noticeably slow down on the last stretch. In practice, Break-focused damage profiles tend to stay stable and are usually the smoothest way through this floor.
The pressure pattern also shifts by wave: the first wave plays more like a two-target control check where you don’t want to get dragged into extra mechanics for too long, while the second wave is the real “boss” feel—it summons bugs that spread/absorb damage and stretch your clear time if you don’t manage them, which is exactly the kind of situation Tempering punishes for crit teams
Strategy
In Wave 1, treat it like a “mark management” check rather than a pure DPS race. Gryphon can apply Aquila’s Mark and then summon Meteoric Eagles—delete the Eagles to dispel the mark and keep your Energy from getting choked. Meanwhile, Pegasus stacks Oronyx’s Mark and you can clear it by using that character’s Ultimate, so plan your Ult usage as both damage and cleanup to avoid getting snowballed by debuffs.
In Wave 2, treat True Sting’s Ready Order as a hard timer—once it charges, it’s lining up Swarm Onslaught next action. Onslaught is nasty because it cleanses CC/Break on the swarm and makes the target gain Wind Shear stacks every time they get attacked, so rapid multi-hit turns can backfire unless you have cleanse/mitigation ready.
Also don’t let the fight turn into “infinite bugs”: True Sting can spawn more True Stings, and killing blows can splash your whole team and even increase DMG received, so save your big AoE/break tools for right after summon moments and stabilize before you pop multiple adds at once.
Team Recommendation
|
Team 1 |
|||
|
|
|
|
Trailblazer (Harmony) |
|
Team 2 |
|||
|
Firefly |
The Dahlia |
Fugue |
|
|
Team 3 |
|||
|
Hysilens |
|
Tribbie |
Gallagher |
|
Team 4 |
|||
|
(E1S1) |
Sparkle |
Tribbie |
Dan Heng • Permansor Terrae |















A Special Gift Just for You!
LDShop has a special deal for you—copy the exclusive code "LDSHOPHSR" and get a 5%OFF coupon for your next purchase! You can redeem the coupon by pasting the code in your Personal Center page, or redeem it directly at checkout. Please click the button below to top up now!


Discount code validity period: 2026.04.01 00:00:00 - 2026.09.30 23:59:59
Knight III
Taunting: Enemy target takes immediate action after being attacked 6 time(s). This tally resets at the start of the enemy target's turn.
Interference: After the enemy target uses an attack, randomly causes 5% or 10% action delay to the attacked target.
|
Wave 1 |
|
|
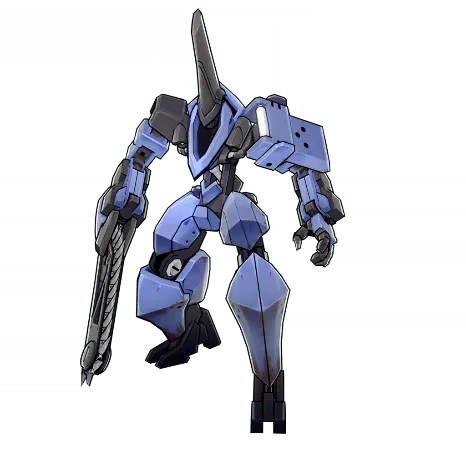
Automaton Direwolf |
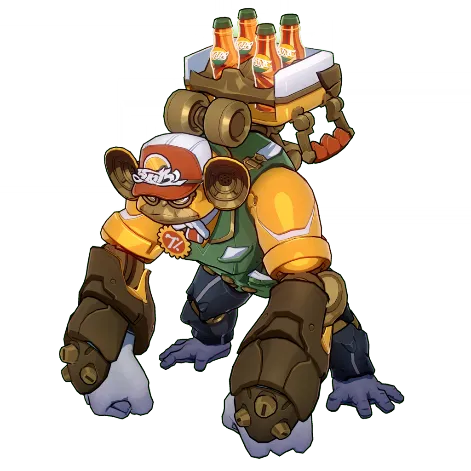
Dreamjolt Troupe's Sweet Gorilla |
|
Wave 2 |
|
|
Ichor Memosprite: Judge of Oblivion |
|

Analysis
Knight III is a break-window stage that punishes mindless hit spam. Your key target wants its Toughness broken, and the environment adds two layers of turn-control chaos: Taunting forces the enemy to take an immediate action after it’s been attacked enough times, and Interference can randomly delay your units after they get hit. The practical result is simple: if you trigger the “extra enemy turn” right before you break, the enemy moves, refills momentum, and your burst can end up dumping into a worse window. That’s why the stage plays best when you count hits, break on purpose, then cash out inside the broken window.
Strategy
Your default plan is “break first, burst second.” Don’t open with your highest hit-count sequences just because they’re available. Instead, walk the Taunting counter toward 6, then force the break right before you’d trigger the bonus enemy action, and only then unload multi-hit ults/skills. This keeps the fight from turning into “enemy steals a turn mid-burst and your window collapses.”
Wave 1: respect the two different threat styles. Direwolf’s lock-on leads into heavy single-target hits and it ramps SPD as the fight goes on, so you want to either break/disable it on schedule or be ready with real sustain for the focused targets. Sweet Gorilla is messy because of the 4-hit bounce + summons + charge with Toughness Protection; if you can keep shields up, you both stabilize the randomness and get value from its “hit shield → self-damage/DEF down” interaction. Clear the adds when they show up so you don’t get dragged into extra incoming-hit rolls that wreck your turn order via Interference.
Wave 2: treat it like a scripted break check. Keep the lock-on target protected, and lean into the boss’s own rules: it takes reduced damage while not Weakness Broken, but once you break it, it gets heavily delayed and takes increased damage—that’s your real kill window. Shields are unusually valuable here because several of its key attacks will reduce its Toughness when hitting a shielded target, and killing its summoned Pheasants also chunks its Toughness, letting you reach the break window faster.
Team Recommendation
|
Team 1 |
|||
|
Cyrene |
Evernight |
Trailblazer (Remembrance) |
Hyacine |
|
Team 2 |
|||
|
Phainon |
Sunday |
Cerydra |
Dan Heng • Permansor Terrae |
|
Team 3 |
|||
|
Mydei |
Cyrene (E0S1) |
Ruan Mei |
Hyacine |
|
Team 4 |
|||
|
Hysilens |
Kafka |
Black Swan |
Dan Heng • Permansor Terrae |








Final Stage – King in Check

"Harmonious Choir" The Great Septimus
Resilient Armor+: Enemy target initially has 3 stacks of "Resilient Armor+," and each stack reduces DMG taken by 15%. Enemy targets lose 1 stack of "Resilient Armor+" each time their Toughness is reduced to 0. Stacks of this effect will reset at each of the enemy target's phase.
Depowered: When entering combat, reduces ally target's Energy by 50% and decreases their Energy Regeneration Rate by 50% outside of their turn for 2 turn(s).
Unending Refinement: After the enemy target takes DMG, reduces DMG taken by this unit by 2% and CRIT DMG taken by 4%, stacking up to 10 time(s). These stacks are cleared when the enemy target's turn begins or when they enter the Weakness Break state. While the enemy target is in the Weakness Break state, stacks cannot be accumulated.
Buff
|
No Break No Rise |
Increases all ally targets' Break Effect by 60%. Each time an enemy target's Toughness is reduced to 0, increases Break DMG taken by that target by 15%, stacking up to 4 times. |
|
Impassioned Spirits |
Increases all ally targets' ATK by 40%. When using "Horizon's Echo From Afar," additionally increases all ally targets' ATK by 20%, this effect is stackable. |
|
Seize the Moment |
Increases all ally targets' DMG by 40%. After an ally target uses an attack, applies Weakness corresponding to this unit's Type to the attacked enemy target. This effect is removed when the enemy target recovers from Weakness Break state. |
Analysis
This is basically a Break + tempo check disguised as a boss fight. In Phases 1–2, Septimus fights alongside four “Echoes of Faded Dreams” and runs on multi-layer Toughness, so if you don’t control the add cycle, the boss gets to “play the choir” and your HP bar evaporates fast. The key twist is that damage dealt to the Echoes is redistributed to Septimus, and Weakness Breaking the Echoes delays both them and Septimus—so breaking the adds isn’t “extra,” it’s the fight’s main lever.
Then in Phase 3, it shifts into a hard countdown: the boss form takes an action after each of your actions and, after seven turns, fires a massive AoE that ignores DEF. Your job is to chew through Toughness and secure breaks (each Toughness break also grants your team a shared shield state), otherwise that nuke can just end the run.
Strategy
- Open by breaking Echoes, not tunneling the main body. Use AoE/cleave to hit multiple targets and aim to have all Echoes broken before Septimus acts—if they’re all Weakness Broken on its turn, it can’t use its heavy “choir” follow-ups (the ones that make the Echoes attack with it).
- Treat Echoes as the boss’s HP proxy. Since Echo damage is fully redistributed to Septimus, you’re not “wasting damage” by hitting adds—breaking and splashing them is often the fastest way to push phase progress and reduce incoming pressure.
- Respect Alien Dream. If your key breaker/DPS gets slept, your whole break plan collapses—bring a reliable cleanse or enough Effect RES to avoid getting bricked mid-rotation.
- Phase 3 is a break race. Once the countdown form appears, stop playing “perfect damage” and start playing “most Toughness per action.” Spend turns on break application, not fancy setup, and lean on the shields you gain from Toughness breaks to survive if you can’t fully prevent the nuke.
Team Recommendation
|
Buff 1 |
|||
|
Firefly |
The Dahlia |
Fugue |
Trailblazer (Harmony) |
|
Buff 2 |
|||
|
Phainon |
Cerydra |
Trailblazer (Remembrance) |
Cyrene |
|
Buff 3 |
|||
|
Castorice |
Cyrene |
Evernight |
Hyacine |


Rewards
In this gameplay, Trailblazers will have a chance to obtain special leveling items, limited-time avatar frames, redeemable outfits,and more as rewards.

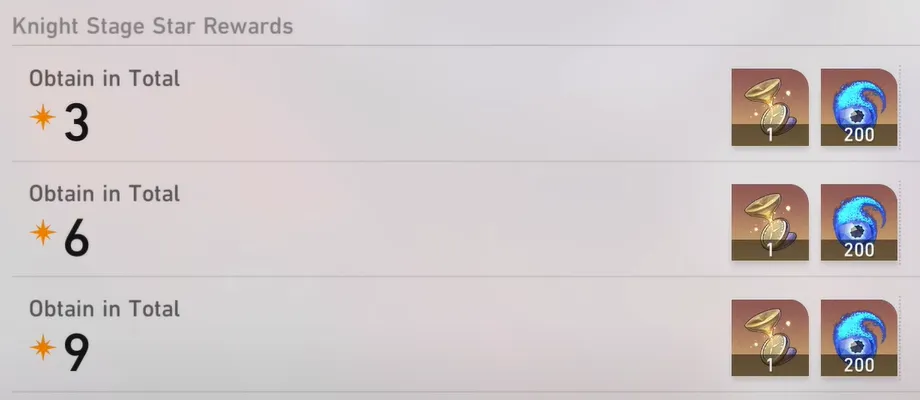
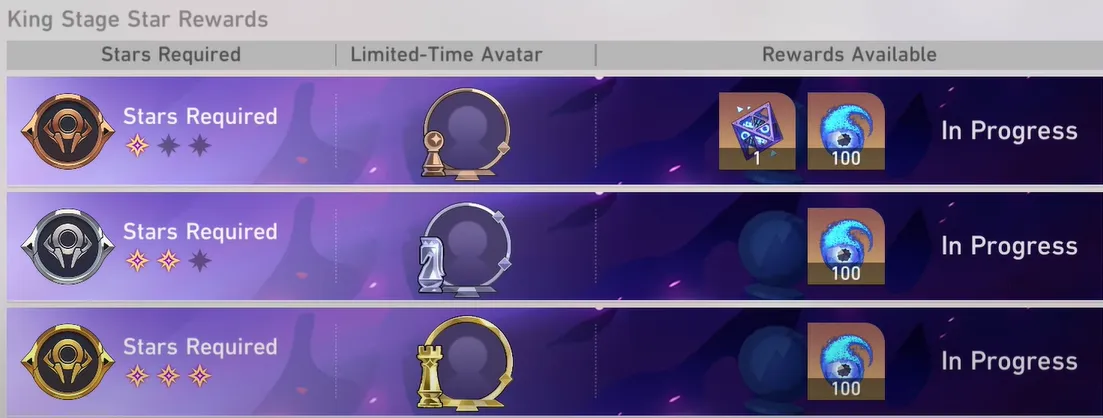
There are no Stellar Jade rewards, and the reason is simple: just unlocking it requires getting full stars in all three “Abyss” stages. Clearing it demands three different teams to complete 3+1 stages, which makes it even harder than fully clearing the current Abyss. Some players might not be able to finish it.
So why release it without Stellar Jade? The idea is simply to give players more content to enjoy. While it doesn’t offer Stellar Jade, it does provide character development materials and cosmetic rewards, which help with progression and let you show off new decorations.
Conclusion
If you treat Great Septimus like a “Break rhythm game” instead of a pure DPS race, the whole Final Stage gets way calmer: keep Echoes under control, line up clean Break windows, and don’t let Phase 3 drag into a panic timer. Once your team can consistently break on schedule, your clears stop feeling like coin flips and start feeling repeatable.
And if you’re just one key unit, Light Cone, or Eidolon away from making that Break loop truly comfy, you can always top up Oneiric Shard safely and smoothly through LDShop—so you go back in with a stronger roster and watch the Choir fall apart on your terms.






 TOP UP HSR WITH DISCOUNT NOW
Rich Experienced Game Editor
Rich is a passionate gamer and strategy explorer who loves uncovering hidden mechanics, experimenting with team comps, and sharing tips that actually help players succeed. She has a talent for breaking down complex systems into easy-to-understand guides, making even the trickiest battles feel manageable. When she’s not diving into virtual worlds, you might find her debating game lore, hunting for easter eggs, or enjoying a snack while plotting her next in-game strategy. Rich’s goal? Helping fellow gamers have more fun while leveling up their skills.
